
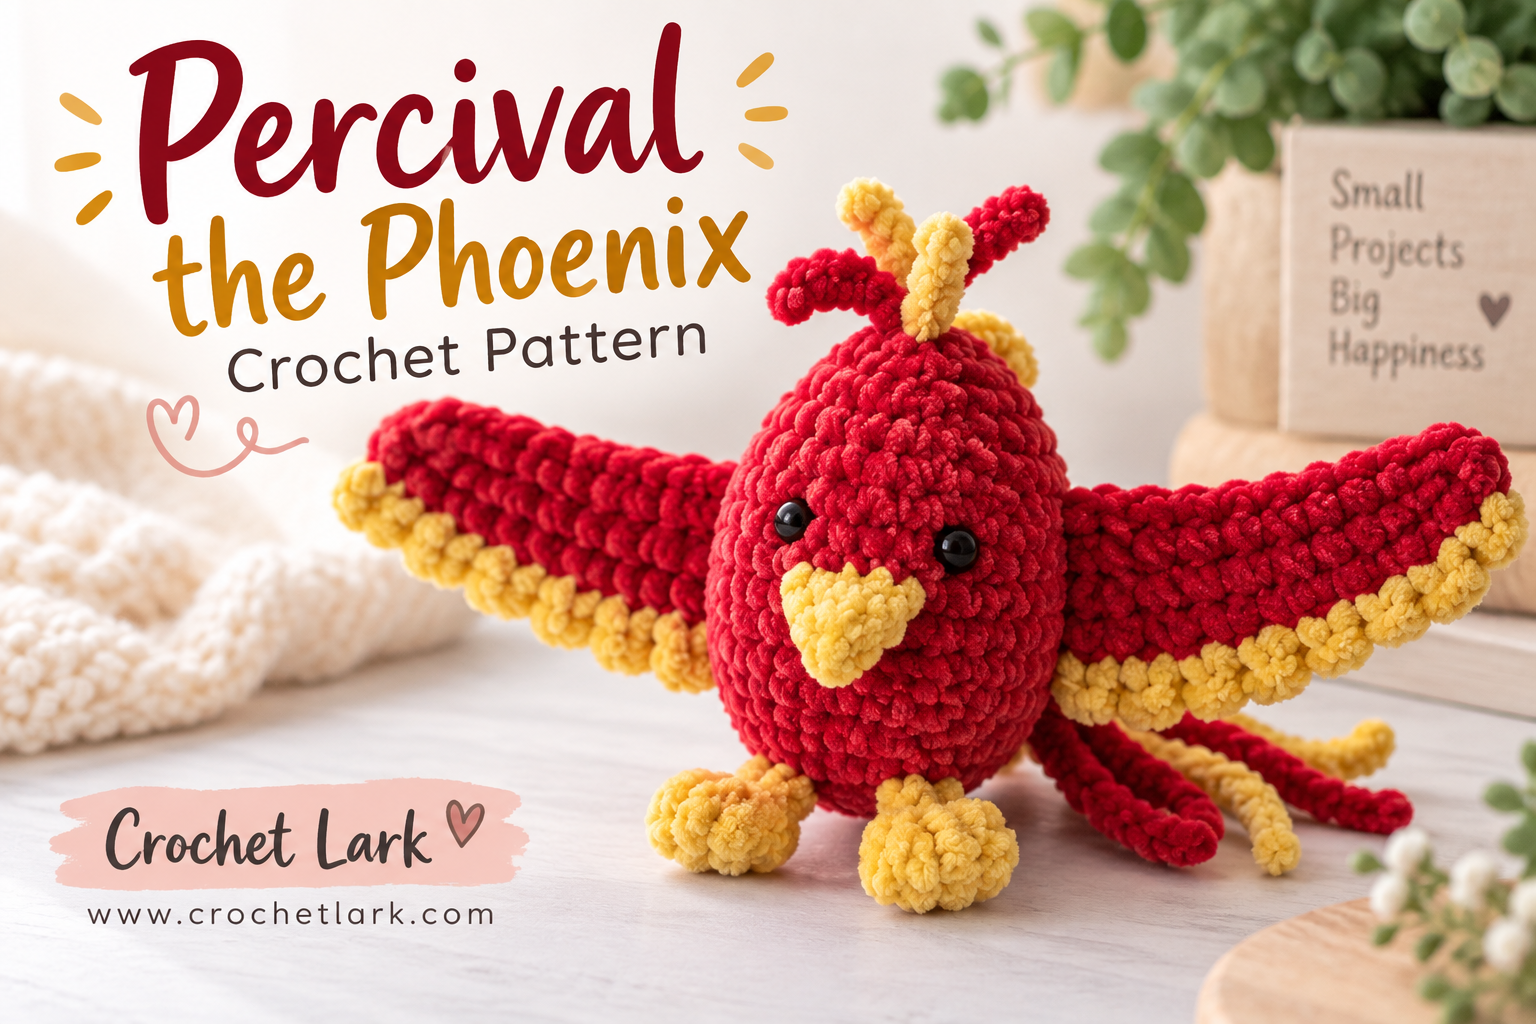
Percival the Phoenix is a small, colorful amigurumi packed with personality. His rounded red body, golden beak and feet, wide wings, feathered crest, and dramatic tail make him instantly recognizable as a tiny mythical bird.
Although Percival has several decorative details, the construction is manageable because the feet and beak are crocheted directly onto the body. That leaves only the wings, crest, and tail to sew in place during final assembly.
The original project uses DK chenille yarn, which gives the phoenix its soft, plush texture. The same construction can also be worked in other yarn fibers, although changing the yarn or hook will affect the finished size.
Quick Answer
This phoenix crochet pattern creates an egg-shaped amigurumi measuring approximately 2.8 inches (7 cm) tall and 6.3 inches (16 cm) across the wings when made with the verified DK chenille yarn and a 2.5 mm crochet hook.
Percival is an intermediate-level project featuring a mostly no-sew body, shaped wings, a two-color crest, and six decorative tail feathers.
Why You’ll Love This Project
- Small enough to make with relatively little yarn
- Feet and beak are attached while crocheting the body
- Dramatic wings create an impressive finished shape
- Uses simple amigurumi increases and decreases
- Perfect for fantasy-themed crochet collections
- Easy to customize with your favorite fiery color combinations
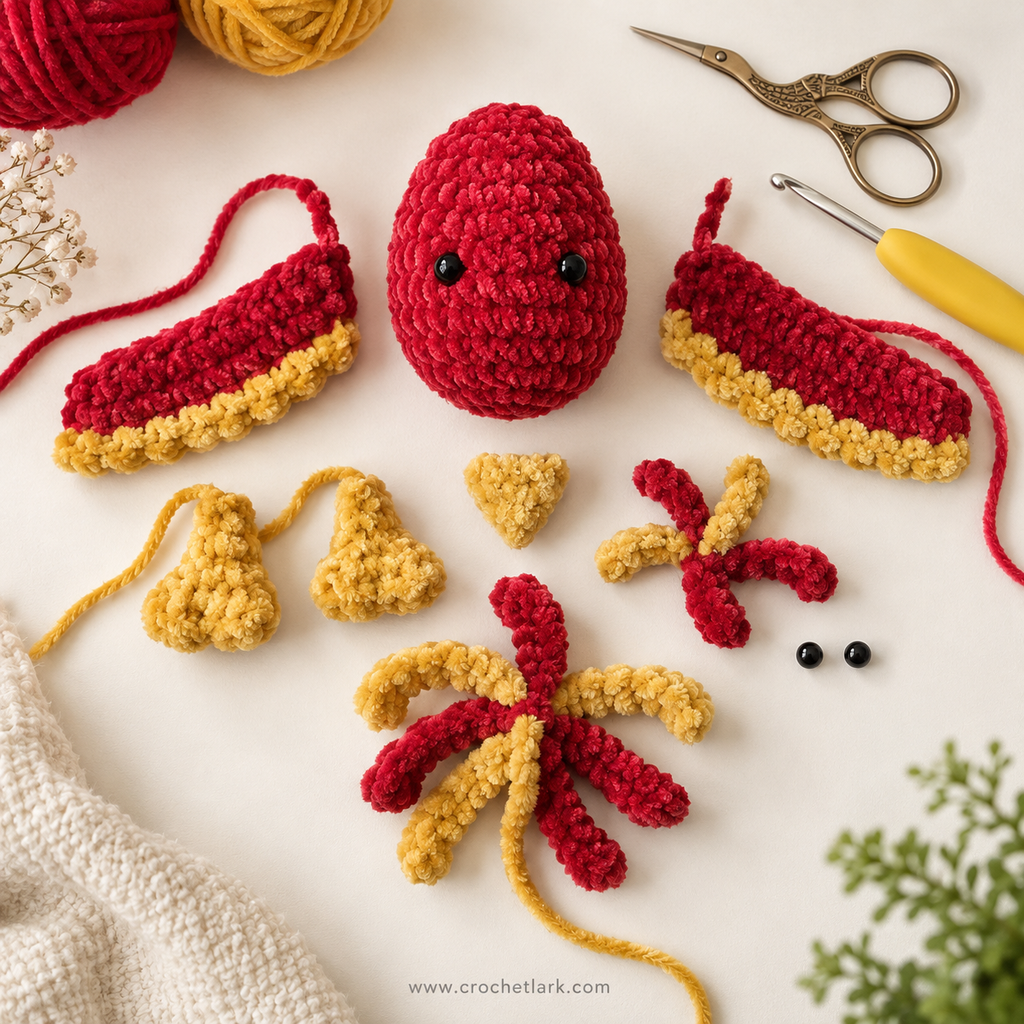
Materials
You will need:
- DK chenille yarn
- Color A – Red: approximately 7 g / 20 yd
- Color B – Yellow: approximately 2 g / 6 yd
- 2.5 mm crochet hook
- Polyester stuffing
- Two 6 mm safety eyes
- Yarn or tapestry needle
- Scissors
- Pins
- Stitch marker
The reference project was made with Rico Design Ricorumi Nilli Nilli DK chenille yarn.
Safety Note
Safety eyes can be a choking hazard and are not appropriate for toys intended for children under three. Embroidered or crocheted eyes are a safer alternative for young children.
Finished Size
Using the verified yarn and hook combination, the finished phoenix measures approximately:
Height: 7 cm / 2.8 inches
Wingspan: 16 cm / 6.3 inches
Your finished measurements may vary depending on yarn choice, hook size, and personal tension.
Gauge
Exact gauge is not essential for this amigurumi project, but the reference gauge is approximately:
6 sc = 1 inch / 2.5 cm
6 rows = 1 inch / 2.5 cm
Keep the stitches firm and consistent so the stuffing does not show through the fabric.
Abbreviations
This pattern uses US crochet terminology.
- R – Round or row
- st / sts – Stitch / stitches
- ch – Chain
- sl st – Slip stitch
- MC – Magic circle
- sc – Single crochet
- hdc – Half double crochet
- dc – Double crochet
- tr – Treble crochet
- inc – Increase: work 2 sc in one stitch
- dec – Decrease
- FLO – Front loop only
Before You Begin
Use the following color references throughout the instructions:
Color A: Red
Color B: Yellow
Most sections are worked in rounds unless the instructions tell you otherwise.
Use a stitch marker to identify the beginning of each round.
For the body, add stuffing gradually as you work upward rather than waiting until the final rounds.
Invisible decreases are useful for keeping the body surface neat.
Make the beak and both feet before starting the body, because these pieces are attached directly during the body rounds.
Crochet Instructions
Beak
Using Color B – Yellow.
The beak is not stuffed.
R1
Make a magic circle and work 4 sc into it.
(4 sts)
R2
Repeat:
sc, inc
2 times around.
(6 sts)
R3
Repeat:
2 sc, inc
2 times around.
(8 sts)
R4
Ch 1.
Flatten the beak so the stitches from the front and back edges line up.
Work 4 sc through both layers to close the open edge.
(4 sts)
Fasten off.
Weave the remaining yarn end inside the beak.
Feet – Make 2
Using Color B – Yellow.
Do not stuff the feet.
Foundation
Ch 6.
R1
Beginning in the second chain from the hook:
Work 1 sc in each of the next 5 chains.
Continue around the opposite side of the starting chain and work:
1 sc in each of the next 5 stitches.
Join with a sl st to the first sc.
Ch 1.
(10 sts)
R2
Sc in every stitch around.
Join with a sl st.
Ch 1.
(10 sts)
R3
Repeat twice:
sc, dec, 2 sc
Join to the first sc with a sl st.
Ch 1.
(8 sts)
R4
Repeat twice:
2 sc, dec
Join to the first sc with a sl st.
Ch 1.
(6 sts)
R5
Flatten the foot.
Work 3 sc through both layers to close the opening.
(3 sts)
Fasten off and hide the yarn end inside the foot.
Repeat for the second foot.
Body
Using Color A – Red.
Stuff the body firmly as you crochet.
R1
Work 8 sc into a magic circle.
(8 sts)
R2
Inc in every stitch around.
(16 sts)
R3
Repeat around:
sc, inc
(24 sts)
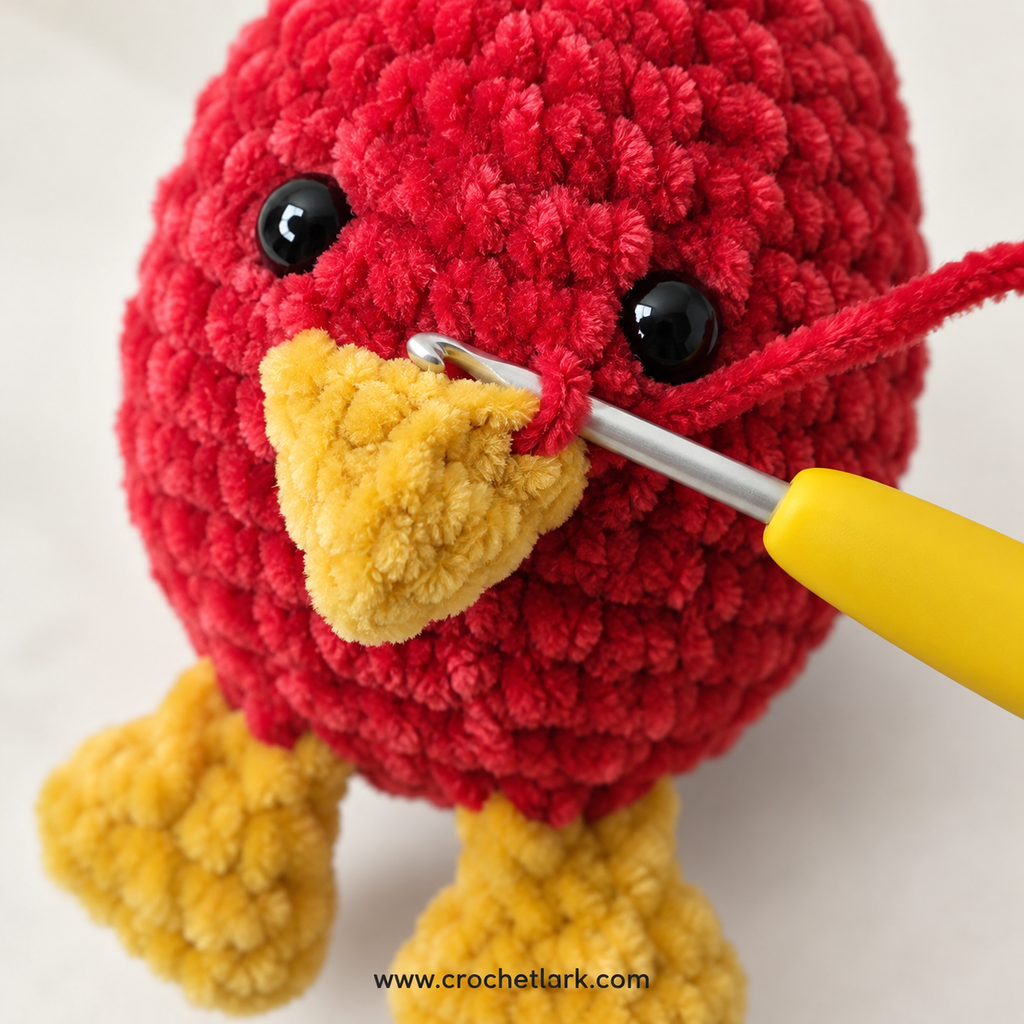
R4 – Attach the Feet
Work:
3 sc
Position the first foot against the body.
Crochet through both the foot and the corresponding body stitches for the next:
3 sc
Then work:
2 sc
Attach the second foot in exactly the same way with:
3 sc
Finish the round with:
13 sc
(24 sts)
To attach each foot, insert the hook through a stitch on the foot and then through the corresponding body stitch before completing the single crochet.
R5
Repeat around:
2 sc, inc
(32 sts)
R6-R9
Sc around for four rounds.
(32 sts each round)
R10 – Attach the Beak
The beak is attached using the same method used for the feet.
Position it above and approximately centered between the feet.
Work sc around while crocheting the beak directly onto the body.
The verified stitch placement is:
8 sc, attach the beak with 4 sc, 20 sc
(32 sts)
The exact visual position of the beak is more important than rigidly following the placement count if your tension has shifted its position slightly.
R11-R12
Sc around.
(32 sts for each round)
R13
Repeat around:
2 sc, dec
(24 sts)
R14
Sc around.
(24 sts)
Add the Eyes
Insert the two 6 mm safety eyes between R11 and R12.
Leave approximately 5 stitches between the eyes.
Make sure the eyes sit evenly above the beak before securing the backs.
R15
Repeat:
2 sc, dec
6 times around.
(18 sts)
R16
Sc around.
(18 sts)
R17
Repeat:
sc, dec
6 times.
(12 sts)
R18
Sc around.
(12 sts)
Finish stuffing the phoenix firmly, paying particular attention to the top of the body.
R19
Dec around.
(6 sts)
Fasten off, leaving a short yarn tail.
Thread the tail through the front loops of the remaining 6 stitches.
Pull firmly to close the opening.
Secure the end and hide it inside the body.
Wings – Make 2
Use Color A – Red and Color B – Yellow.
The wings are not stuffed.
Begin with Color A.
Foundation
Ch 15.
R1
Beginning in the second chain from the hook:
Work 14 sc across the chain.
Continue along the opposite side of the foundation chain and work another:
14 sc
Join to the first sc with a sl st.
(28 sts)
R2
Ch 1.
Sc around.
Join with a sl st.
(28 sts)
R3
Ch 1.
Work:
- 5 sc
- 4 hdc
- 3 dc
- 4 tr
- 3 dc
- 4 hdc
- 5 sc
Join to the first sc with a sl st.
(28 sts)
This sequence creates the wider central portion of the wing.
R4
Ch 1.
Flatten the wing so both sides line up.
Working through both layers:
14 sc
During the final yarn-over of the 14th stitch, change from Color A to Color B.
Ch 1.
Cut Color A, leaving a long yarn tail for sewing the wing onto the body.
(14 sts)
R5
Turn so you are working back in the opposite direction.
Repeat 7 times:
(sc and hdc in same stitch), (hdc and sc in next stitch)
(28 sts)
Fasten off Color B.
Weave the yellow yarn ends into the wing.
Keep the long red yarn tail available for assembly.
Repeat all wing instructions for the second wing.
Comb / Head Feathers
Use both Color A – Red and Color B – Yellow.
Do not cut the yarn each time you change colors.
Begin with Color A.
Start
Ch 6.
Beginning in the second chain from the hook:
sl st in next 4 chains, sc in final chain
Change to Color B.
Second Feather
Ch 6.
Beginning in the second chain:
sl st in next 4 chains, sc in final chain
Change to Color A.
Third Feather
Ch 6.
Beginning in the second chain:
sl st in next 4 chains, sl st in final chain
Change to Color B.
Fourth Feather
Ch 6.
Beginning in the second chain:
sl st in next 4 chains, sc in final chain
Change back to Color A.
Use Color A to sl st into the stitch at the bottom of the first comb section, bringing the four feathers together.
Cut Color A while leaving a long sewing tail.
Pull this tail completely through the final slip stitch.
Cut Color B, also leaving a long sewing tail.
Hide the two short starting ends inside the center of the comb.
Keep the longer yarn tails available for attaching the comb to the body.
Tail Feathers
Use both Color A – Red and Color B – Yellow.
Do not stuff.
Begin with Color A.
R1
Work 6 sc into a magic circle.
(6 sts)
The six tail feathers are formed from chains attached around this center.
R2 – Feather 1
Using Color A:
Ch 7.
Starting in the second chain from the hook:
6 sc
Sl st into the first sc of the magic circle.
Change to Color B.
Feather 2
Ch 11.
Starting in the second chain:
10 sc
Sl st into the next sc of the magic circle.
Change to Color A.
Feather 3
Ch 13.
Starting in the second chain:
12 sc
Sl st into the next sc of the magic circle.
Change to Color B.
Feather 4
Ch 11.
Starting in the second chain:
10 sc
Sl st into the next sc of the magic circle.
Change to Color A.
Feather 5
Ch 7.
Starting in the second chain:
6 sc
Sl st into the next sc of the magic circle.
Change to Color B.
Feather 6
Ch 5.
Starting in the second chain:
4 sc
Sl st into the final remaining sc of the magic circle.
Fasten off, leaving a long Color B yarn tail for assembly.
Secure the starting yarn end and remaining Color A yarn end into the center of the tail piece.
The finished tail should contain six feathers of different lengths, alternating between red and yellow.
Assembly
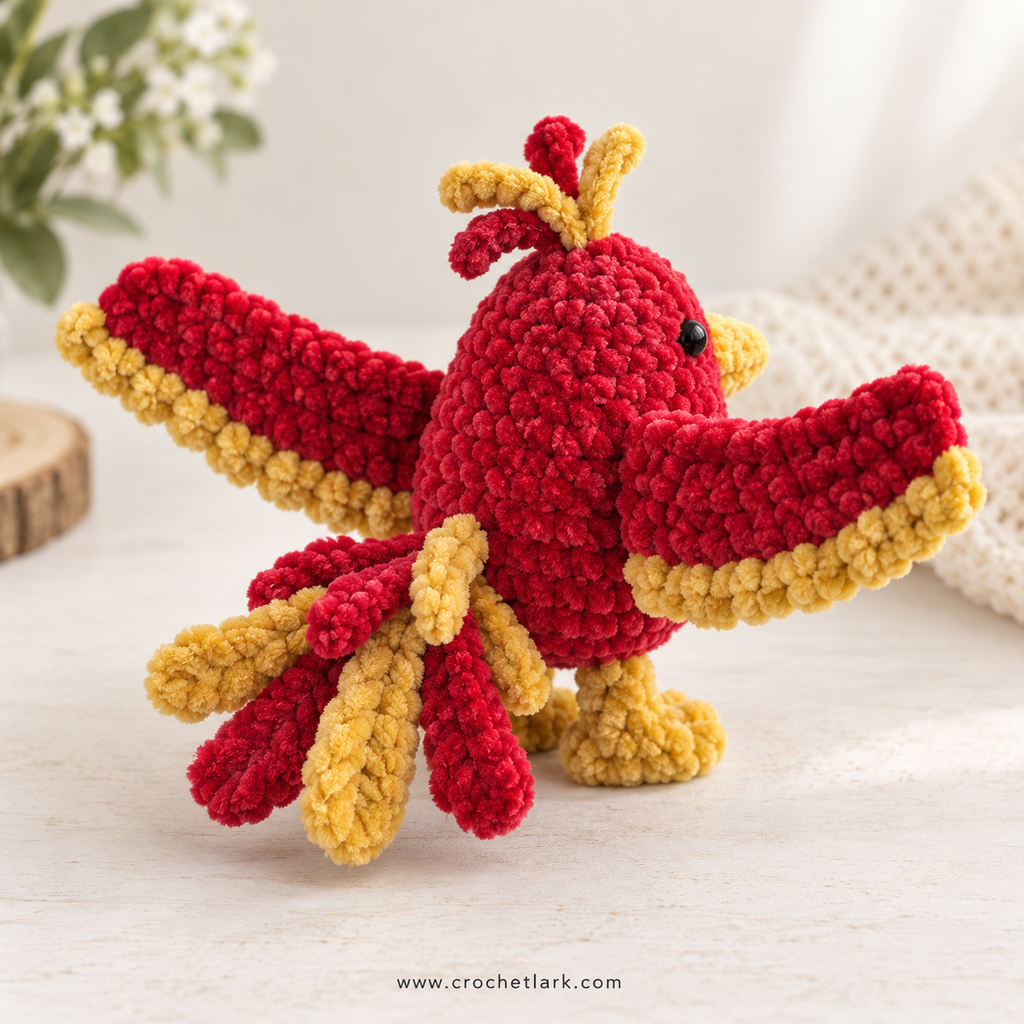
Attach the Comb
Place the comb at the center of the top of the phoenix’s head.
Use the long yarn tails from the comb to stitch it securely to the body.
Arrange the individual strands so they fan outward naturally.
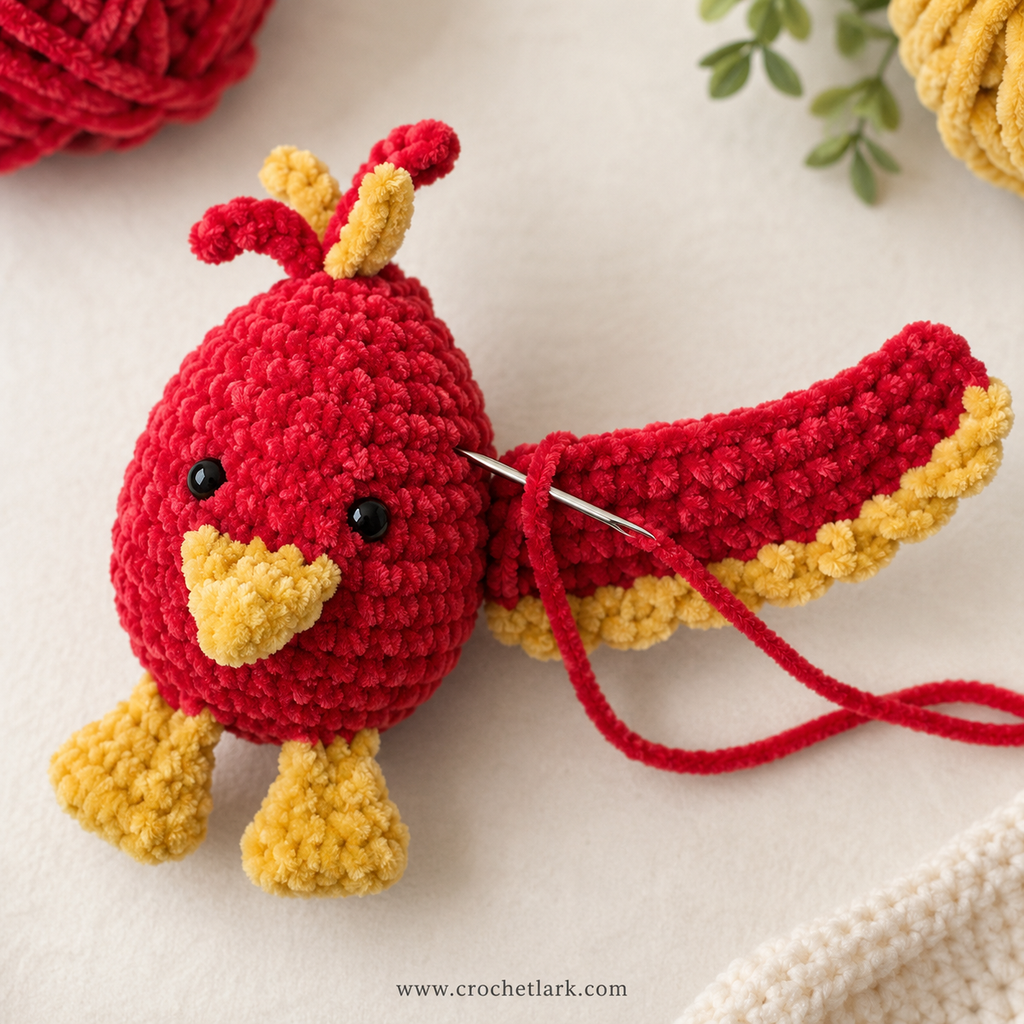
Attach the Wings
Position one wing on each side of the body.
The red section of each wing is sewn to the body approximately across R8 through R13.
Angle each wing slightly upward.
For the reference placement:
- The top attachment point sits approximately 3 stitches from the eye.
- The lower attachment area sits approximately 7 stitches from the side of the beak.
Before sewing permanently, pin both wings in place and check the phoenix from the front to make sure they sit at roughly the same height and angle.
Sew securely using the long Color A yarn tails.
Attach the Tail
Turn the phoenix around so the back is facing you.
Place the magic-circle center of the tail between R4 and R5, centered on the back.
Arrange the feathers so:
- Longer feathers sit toward the upper portion.
- Shorter feathers sit toward the lower portion.
Use the remaining long yarn tail to sew the center of the tail firmly to the body.
Finishing
Check the phoenix from the front, sides, and back before hiding the final yarn ends.
Gently adjust the wings until their angles appear balanced.
Separate and shape the comb feathers so they remain visible from the front.
Fan out the tail feathers rather than allowing them to stack directly on top of one another.
Massage the stuffing gently through the crochet fabric if necessary to restore the rounded egg-shaped body.
Weave all remaining ends securely into the project.
Your Percival the Phoenix is complete.
Helpful Notes
Keep Your Amigurumi Stitches Tight
Chenille yarn can hide small gaps, but your crochet fabric still needs to be firm enough to contain the stuffing. If visible gaps appear, try a slightly smaller hook rather than pulling individual stitches excessively tight.
Mark Your Rounds
The body is worked through several rounds with identical stitch counts. Keeping a stitch marker in the first stitch helps prevent accidentally adding or losing stitches.
Check Placement Before Attaching Pieces
The exact visual positioning of the beak and wings can shift slightly depending on individual tension. Check that everything looks centered before committing to the final attachment.
Stuff Gradually
Adding small amounts of stuffing throughout the body usually produces a smoother result than pushing all the stuffing inside at the end.
Using Another Yarn
Cotton and acrylic can also be used for this project. If you change yarn weight, choose a hook that creates a firm amigurumi fabric and expect the finished dimensions to change.
FAQ
Is this phoenix crochet pattern beginner-friendly?
The verified pattern level is intermediate. You should be comfortable with single crochet, increases, decreases, working around both sides of a foundation chain, basic color changes, and assembling amigurumi pieces.
Is Percival completely no-sew?
No. The feet and beak are crocheted directly into the body, which reduces sewing considerably, but the wings, comb, and tail feathers still need to be attached afterward.
Can I crochet the phoenix with acrylic yarn?
Yes. The construction can be made with acrylic, cotton, chenille, or another suitable amigurumi yarn. Changing the fiber or yarn weight may change the size and texture of the finished phoenix.
Can I make the phoenix larger?
Yes. Using a thicker yarn with an appropriately sized hook should create a larger phoenix. The final measurements will differ from the dimensions listed in this pattern.
Can I use embroidered eyes instead of safety eyes?
Yes. Embroidered or crocheted eyes are particularly useful when making the project for a young child.
Why are the wings worked around both sides of the chain?
Working around both sides of the starting chain creates a narrow oval tube. The piece is then shaped with taller stitches, flattened, and crocheted closed to form the phoenix’s distinctive wing.
Do I need to stuff the wings, feet, beak, comb, or tail?
No. Only the main body is stuffed.
Final Thoughts
Percival is a small amigurumi project with plenty of character. The rounded body keeps the main crochet straightforward, while the outstretched wings, colorful crest, golden feet, and layered tail transform that simple base into a distinctive little phoenix.
The minimal-sew construction also makes the finishing process quicker than it first appears. Once the wings, comb, and tail are attached, a little shaping is all that is needed to bring the finished phoenix to life.