
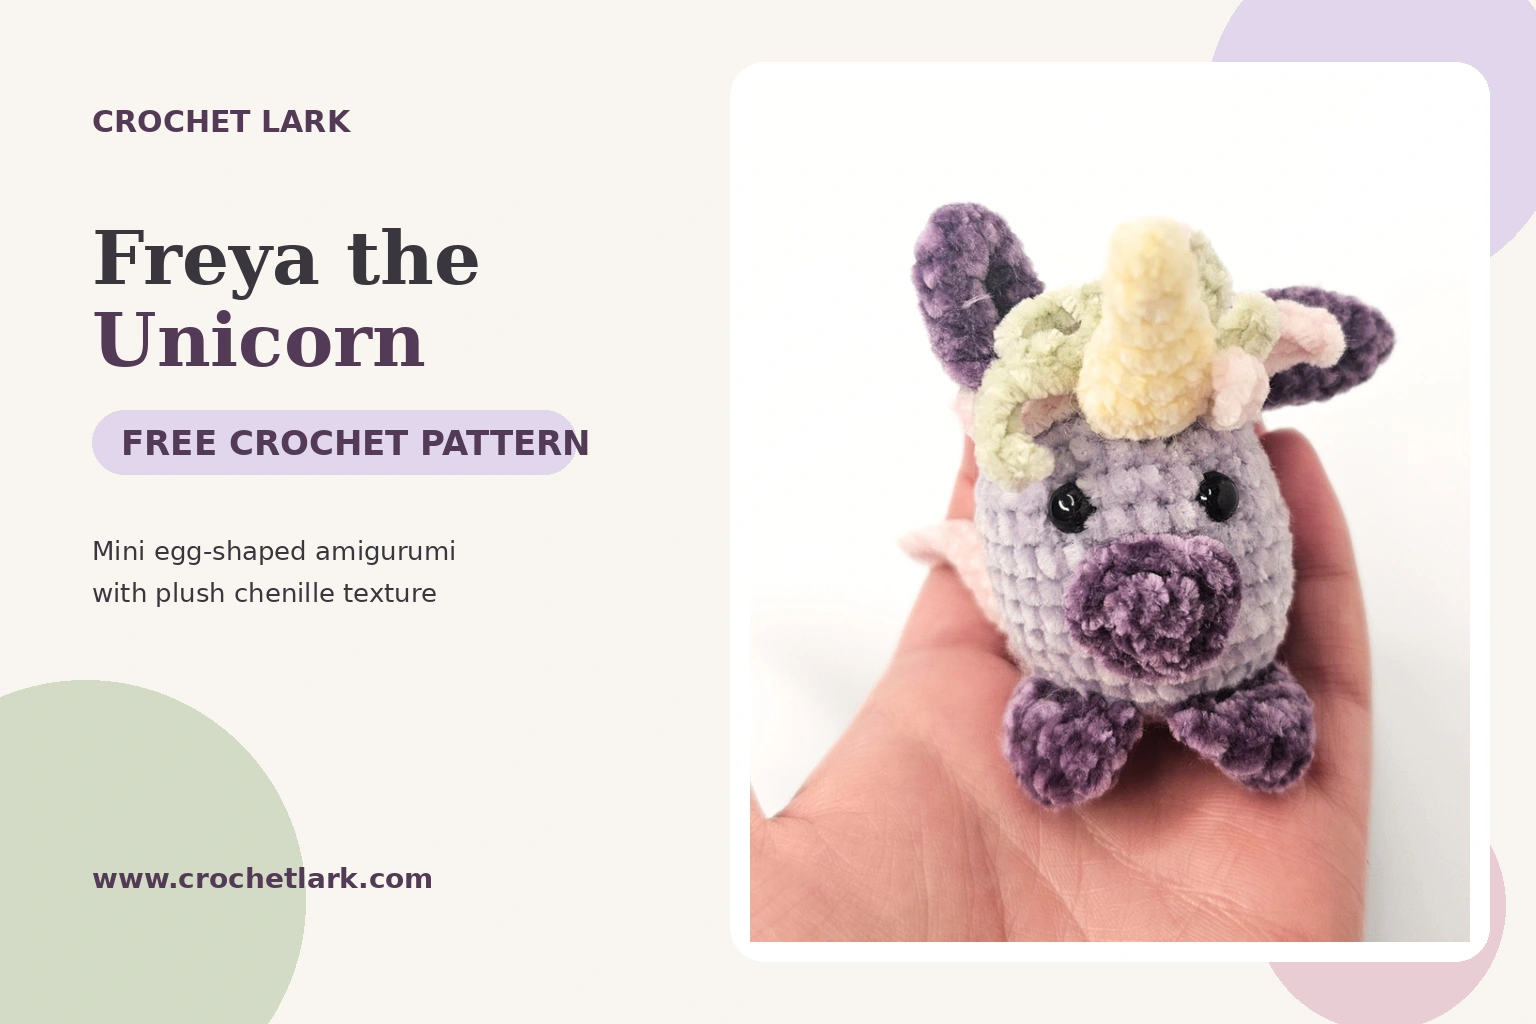
Freya the Unicorn is a tiny egg-shaped amigurumi with soft lavender chenille yarn, deep purple ears and feet, a yellow horn, and a playful pink-and-green mane.
The compact shape makes this a satisfying project when you want a character with plenty of personality without crocheting a large number of separate pieces. The feet and ears are joined directly to the body while crocheting, which also reduces the amount of sewing required.
This pattern uses US crochet terminology and is best suited to crocheters who are comfortable working in rounds, increasing, decreasing, and attaching components as they crochet.
Quick Answer
Freya is a small unicorn amigurumi worked mainly in continuous rounds using DK chenille yarn and a 2.5 mm crochet hook. The finished reference project measures approximately 7 cm / 2.8 inches high by 4.5 cm / 1.8 inches wide. The feet and ears are crocheted first and attached directly during construction of the body.
[PDF DOWNLOAD BUTTON: Download the Printable Freya the Unicorn Crochet Pattern]
Why You’ll Love This Project
- Small project that uses only modest amounts of yarn.
- Feet and ears are joined as you crochet.
- Cute egg-shaped amigurumi construction.
- Excellent project for using leftover chenille yarn.
- Color combinations can easily be customized.
- The completed unicorn makes a sweet gift, desk companion, or decorative amigurumi.
Materials
You will need DK chenille yarn in five colors:
- Color A – Dark Purple: 2 g, approximately 5.2 m / 5.7 yds
- Color B – Light Purple: 5 g, approximately 13 m / 14.3 yds
- Color C – Yellow: 1 g, approximately 2.6 m / 2.9 yds
- Color D – Pink: 1 g, approximately 2.6 m / 2.9 yds
- Color E – Green: 1 g, approximately 2.6 m / 2.9 yds
You will also need:
- 2.5 mm crochet hook
- Toy stuffing
- Yarn needle
- Scissors
- Pins
- Stitch marker
- Two 6 mm safety eyes
Finished Size
With DK chenille yarn and a 2.5 mm hook, the reference unicorn measures approximately:
7 cm / 2.8 inches high × 4.5 cm / 1.8 inches wide
Changing yarn weight, hook size, or individual tension will change the finished dimensions.
Gauge
Gauge is not essential for this amigurumi project, but the verified reference gauge is:
- 6 sc = 2.5 cm / 1 inch
- 6 rows = 2.5 cm / 1 inch
More important than matching gauge exactly is maintaining a firm, even fabric that prevents stuffing from showing between the stitches.
Abbreviations
This pattern uses US crochet terminology.
- R – Round or row
- st / sts – Stitch / stitches
- ch – Chain
- sl st – Slip stitch
- mc – Magic circle
- sc – Single crochet
- inc – Increase
- dec – Decrease
- sk – Skip
- [ … ] × n – Repeat the instructions inside the brackets the stated number of times
- ( ) – Stitch count at the end of the round
Before You Begin
Unless stated otherwise, work the amigurumi pieces in continuous rounds. Place a stitch marker in the first stitch of each round so you can keep track of your position.
A hook slightly smaller than the size normally recommended for your yarn helps produce firm amigurumi fabric. Invisible decreases can also help keep the shaped sections smooth.
Crochet both feet and both ears before beginning the body because these pieces will be attached directly while the body is being crocheted.
If this project is intended for a child under three years old, replace safety eyes with securely embroidered eyes.
Crochet Instructions
Feet – Make 2
Use Color A – Dark Purple.
Do not stuff.
R1: Make a magic circle and work 5 sc. (5)
R2: Inc in every stitch around. (10)
R3: Sc in every stitch around. (10)
R4: Ch 1. Flatten the foot so the two sides meet, then crochet through both layers with 5 sc to close the piece. (5)
Fasten off and weave the yarn tail into the foot.
Make the second foot in the same way.
Ears – Make 2
Use Color A – Dark Purple.
Do not stuff.
R1: Make a magic circle with 4 sc. (4)
R2: [inc, sc] × 2. (6)
R3: [inc, 2 sc] × 2. (8)
R4: [inc, 3 sc] × 2. (10)
R5: [inc, 4 sc] × 2. (12)
R6: [inc, 5 sc] × 2. (14)
R7: [inc, 6 sc] × 2. (16)
R8: Ch 1. Flatten the ear and join the two sides together with 8 sc. (8)
R9: Ch 1. Pinch the base so the previous row folds in half, then crochet the folded edges together with 4 sc. (4)
Fasten off and hide the yarn end inside the ear.
Repeat for the second ear.
Body
Use Color B – Light Purple.
Stuff firmly as the body develops.
R1: Make a magic circle with 8 sc. (8)
R2: Inc in every stitch around. (16)
R3: [sc, inc] × 8. (24)
Attaching the Feet
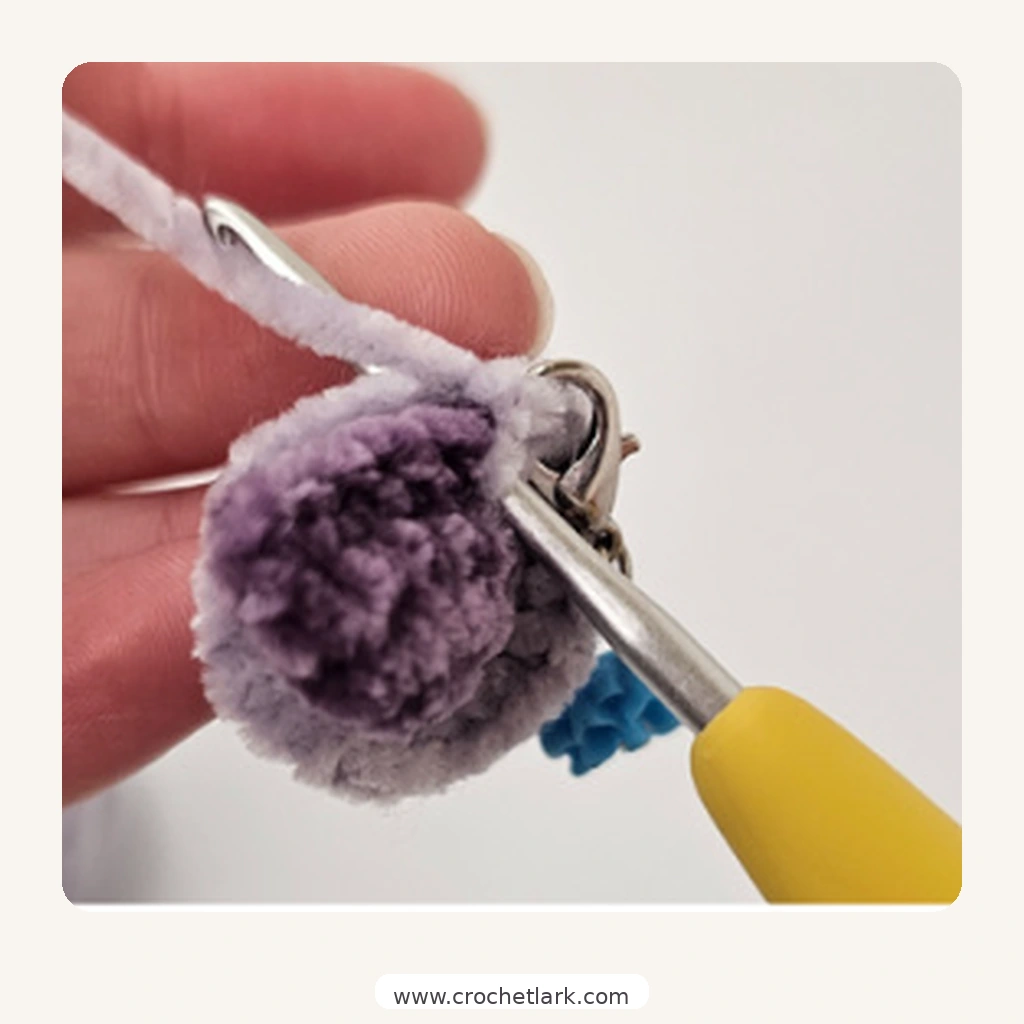
The feet are incorporated during the next round.
When you reach a foot attachment point, place the foot against the body. Insert the hook through the next stitch of the foot and then through the corresponding body stitch. Complete one sc through both layers.
Continue this technique for all five attachment stitches.
R4: 1 sc, attach the first foot with 5 sc, 1 sc, attach the second foot with 5 sc, then 12 sc. (24)
R5: [2 sc, inc] × 8. (32)
R6-R12: Sc in every stitch around for 7 rounds. (32 each round)
If using safety eyes, insert them now between R11 and R12, positioning the eyes with 5 stitches between them.
R13: [2 sc, dec] × 8. (24)
R14: Sc in every stitch around. (24)
R15: [2 sc, dec] × 6. (18)
Attaching the Ears
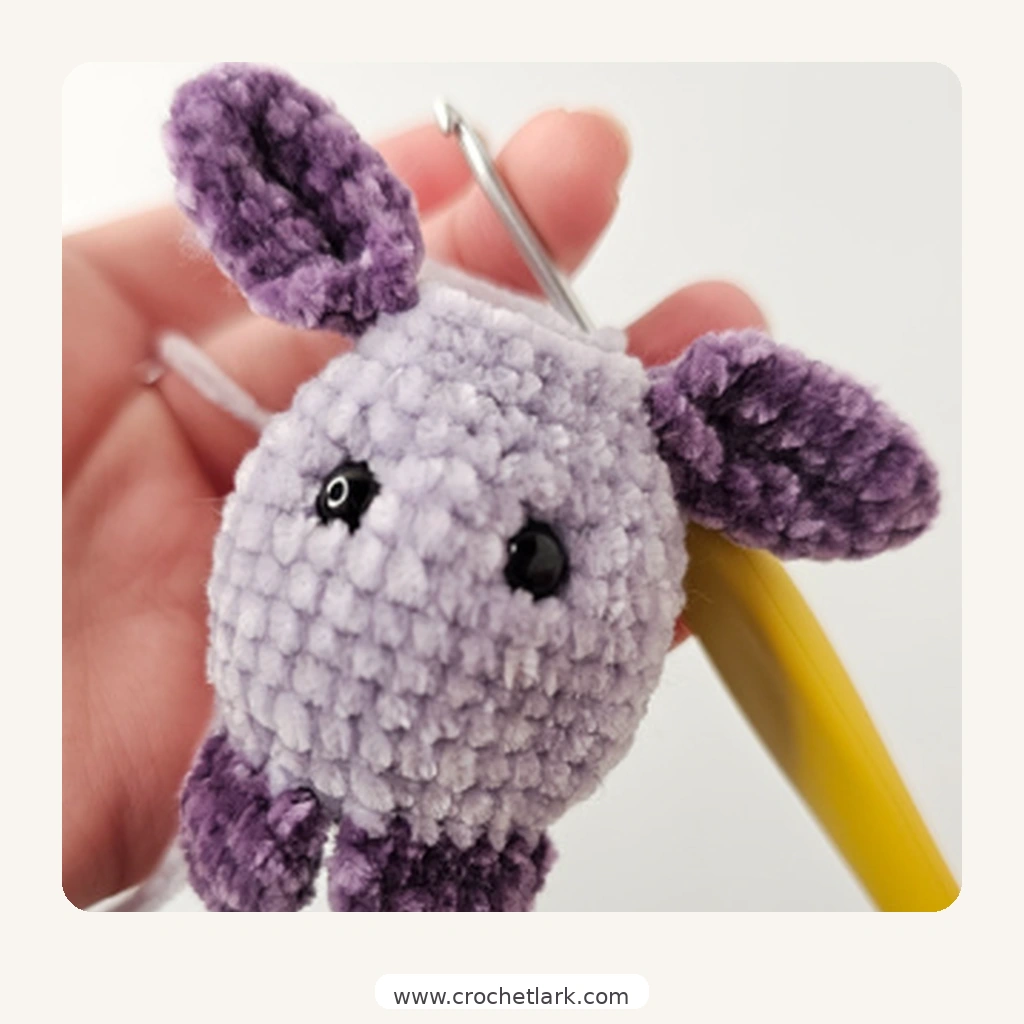
The ears are attached during R16 using the same through-both-layers technique used for the feet.
Position one ear on each side of the head. The open/folded side of each ear should face forward.
R16: Sc around while joining both ears. (18)
The verified stitch sequence is:
- Join first ear with 4 sc
- 5 sc
- Join second ear with 4 sc
- 5 sc
Total: 18 stitches
Placement is more important than following this distribution mechanically if your individual tension shifts the components slightly. Check that the ears are symmetrical before continuing.
R17: [sc, dec] × 6. (12)
R18: Sc in every stitch around. (12)
Finish stuffing the body.
R19: Dec around. (6)
Cut the yarn, leaving enough tail to close the opening.
Thread the yarn through the front loops of the final six stitches. Pull firmly to close the hole, then secure and hide the yarn tail inside the body.
Mouth
Use Color A – Dark Purple.
Do not stuff.
Foundation: Ch 5.
R1: Starting in the 2nd ch from the hook, sc in the next 4 chains. Rotate the foundation and work 1 sc into each of the 4 stitches along the opposite side. Join to the first stitch with a sl st, then ch 1. (8)
R2: [inc, sc in next 2 sts, inc] × 2. Join to the first stitch with a sl st. (12)
Fasten off and leave a long yarn tail for sewing.
Unicorn Horn
Use Color C – Yellow.
Stuff the horn lightly as you work.
Before making the starting slip knot, leave a long yarn tail. This tail will be used later to attach the horn.
Foundation: Ch 10.
Join the last chain to the first chain with a sl st to form a ring. Ch 1.
R1: 10 sc. Join with a sl st to the first sc, ch 1. (10)
R2: 4 sc, dec, 4 sc. Join and ch 1. (9)
R3: 4 sc, dec, 3 sc. Join and ch 1. (8)
R4: 3 sc, dec, 3 sc. Join and ch 1. (7)
R5: 2 sc, dec, 3 sc. Join and ch 1. (6)
R6: 2 sc, dec, 2 sc. Join. (5)
Cut the working yarn.
Thread the short tail through the front loops of the final five stitches and pull closed. Secure the yarn and weave it into the horn.
Keep the long starting tail for assembly.
Mane
Use Colors D and E – Pink and Green.
Do not stuff.
Begin with Color D – Pink.
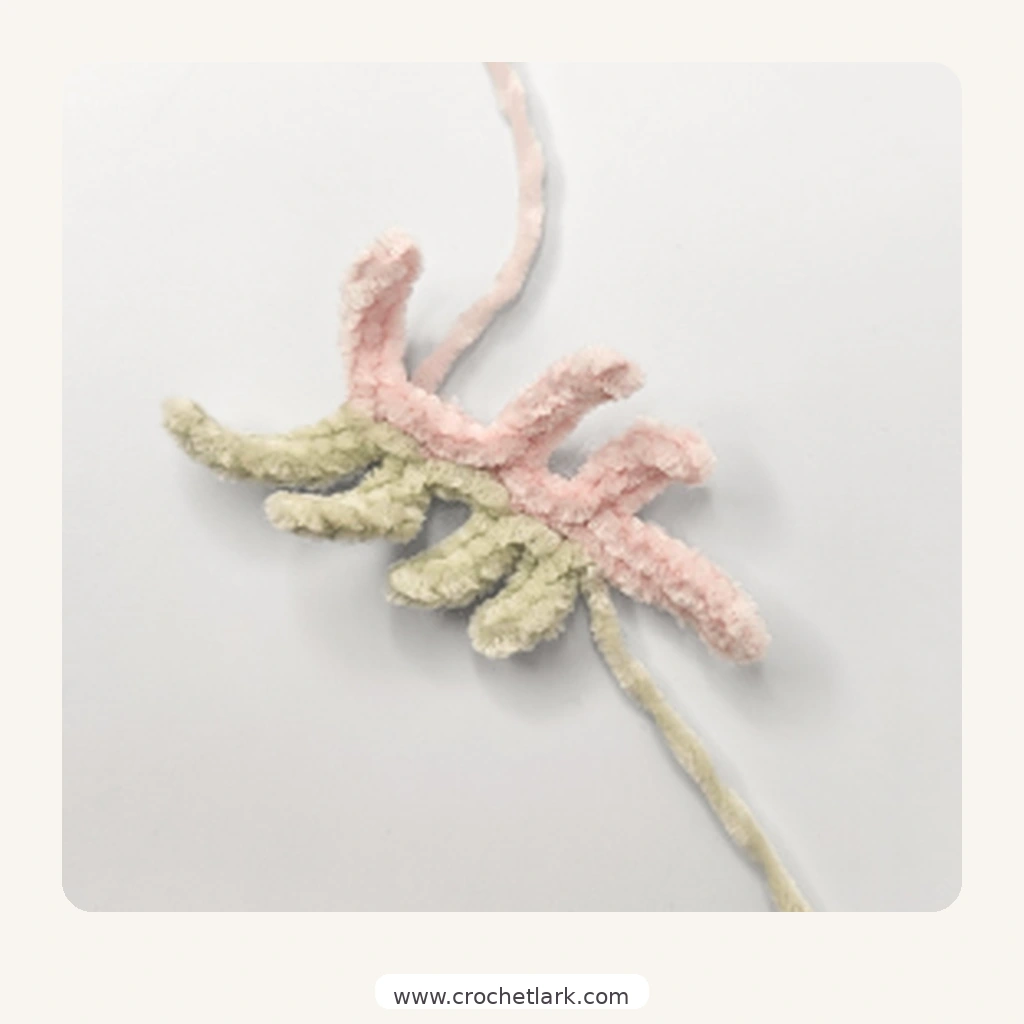
Foundation: Ch 16.
This foundation is referred to below as the main chain.
Step 1: Starting in the 2nd chain from the hook, sl st in the next 7 stitches of the main chain. Ch 5.
Step 2: Starting in the 2nd chain from the hook, sl st along the next 4 chains. Sl st into the next stitch of the main chain.
Step 3: Sl st in the next 3 stitches of the main chain. Ch 7. Beginning in the 2nd chain from the hook, sl st in the next 6 chains. Sl st into the next stitch of the main chain.
Step 4: Sl st in the next 3 stitches of the main chain. Ch 7. Beginning in the 2nd chain from the hook, sl st in the next 6 chains.
Step 5: Move to the opposite side of the foundation chain and work 1 sc. Change to Color E – Green.
Cut Color D, leaving a long tail for sewing.
Step 6: Ch 9. Starting in the 2nd chain from the hook, sl st in the next 8 chains. Sl st in the next 2 stitches of the main chain.
Step 7: Ch 7. Starting in the 2nd chain from the hook, sl st in the next 6 chains. Sl st in the next 4 stitches of the main chain.
Step 8: Ch 6. Beginning in the 2nd chain from the hook, sl st in the next 5 chains. Sl st in the next 2 stitches of the main chain.
Step 9: Ch 5. Starting in the 2nd chain from the hook, sl st in the next 4 chains. Sl st again into the same stitch of the main chain.
Fasten off Color E, leaving a long yarn tail for sewing.
Weave the short starting tails into the mane. Keep the longer pink and green tails available for assembly.
Tail
Use Colors D and E – Pink and Green.
Begin with Color D – Pink.
Do not stuff.
Foundation: Ch 16.
Step 1: Starting in the 2nd chain from the hook, sl st through the next 14 chains. Sc in the final chain and change to Color E. (15)
Step 2: Ch 15. Starting in the 2nd chain from the hook, sl st through the next 14 chains. Sc into the first stitch of the previous chain and change back to Color D. (15)
Step 3: Ch 12. Starting in the 2nd chain from the hook, sl st through the next 11 chains.
Fasten off, leaving a long yarn tail for sewing.
Weave in the other loose yarn ends.
Assembly
1. Attach the Mouth
Position the purple mouth on the front of the unicorn so it sits approximately across R7-R10 of the body.
Use the remaining mouth yarn tail to sew it securely in place.
If desired, use embroidery thread to add two small nostrils.
2. Attach the Horn
Center the yellow horn between the ears.
The horn should cover approximately R14-R17 of the body, with its shaped lower section facing toward the front.
Use the long starting yarn tail to sew the horn firmly in place.
3. Attach the Mane
Place the main chain of the mane immediately behind the horn.
Sew the chain to the head so the mane wraps around the back of the horn. Position the green portion closest to the horn, with a strand from each color visible toward the front.
Secure both long yarn tails and hide the ends.
4. Attach the Tail
Position the tail at the center back of the body between R4 and R5.
Sew it securely using the remaining long yarn tail.
Gently twist the three strands around one another to create the intertwined tail appearance.
[IN-ARTICLE IMAGE 4]
Helpful Notes
Keep checking the placement of attached pieces from the front before finishing a round. Small differences in tension can slightly shift where components naturally sit.
Add stuffing gradually rather than pushing in a large amount at once. This helps preserve Freya’s smooth egg-shaped body.
The horn only needs light stuffing. Overstuffing can make the small tapered piece look bulky.
Chenille yarn can make stitches harder to see, so counting stitches and moving your stitch marker at the beginning of every round is particularly useful.
Before trimming any remaining yarn tails, check that the feet, eyes, ears, horn, mane, mouth, and tail are secure.
FAQ
Is this unicorn crochet pattern suitable for beginners?
The pattern is rated intermediate. The basic stitches are straightforward, but attaching the feet and ears while crocheting, shaping the horn, and constructing the mane require more attention than a basic beginner amigurumi.
Can I use cotton or acrylic yarn instead of chenille?
Yes. The project has also been worked successfully in cotton and acrylic yarn. Your finished size will change depending on yarn weight, hook size, and tension.
Do I need to match the gauge exactly?
No. Gauge is mainly provided as a reference for the finished size. Firm, consistent stitches are more important for amigurumi.
Can I embroider the eyes?
Yes. Embroidered eyes are a useful alternative to plastic safety eyes, particularly when making the unicorn for a young child.
Why are the feet and ears made before the body?
They are crocheted directly into the body rounds rather than sewn on afterward. Preparing them first allows you to attach them at the correct rounds without interrupting construction.
Final Thoughts
Freya combines a compact amigurumi shape with enough special details to make the project interesting: folded ears, attached feet, a tiny tapered horn, and a two-color mane and tail.
Once the construction method is familiar, the same pattern can also be personalized with different pastel, rainbow, or high-contrast color combinations while keeping the verified stitch counts unchanged.