
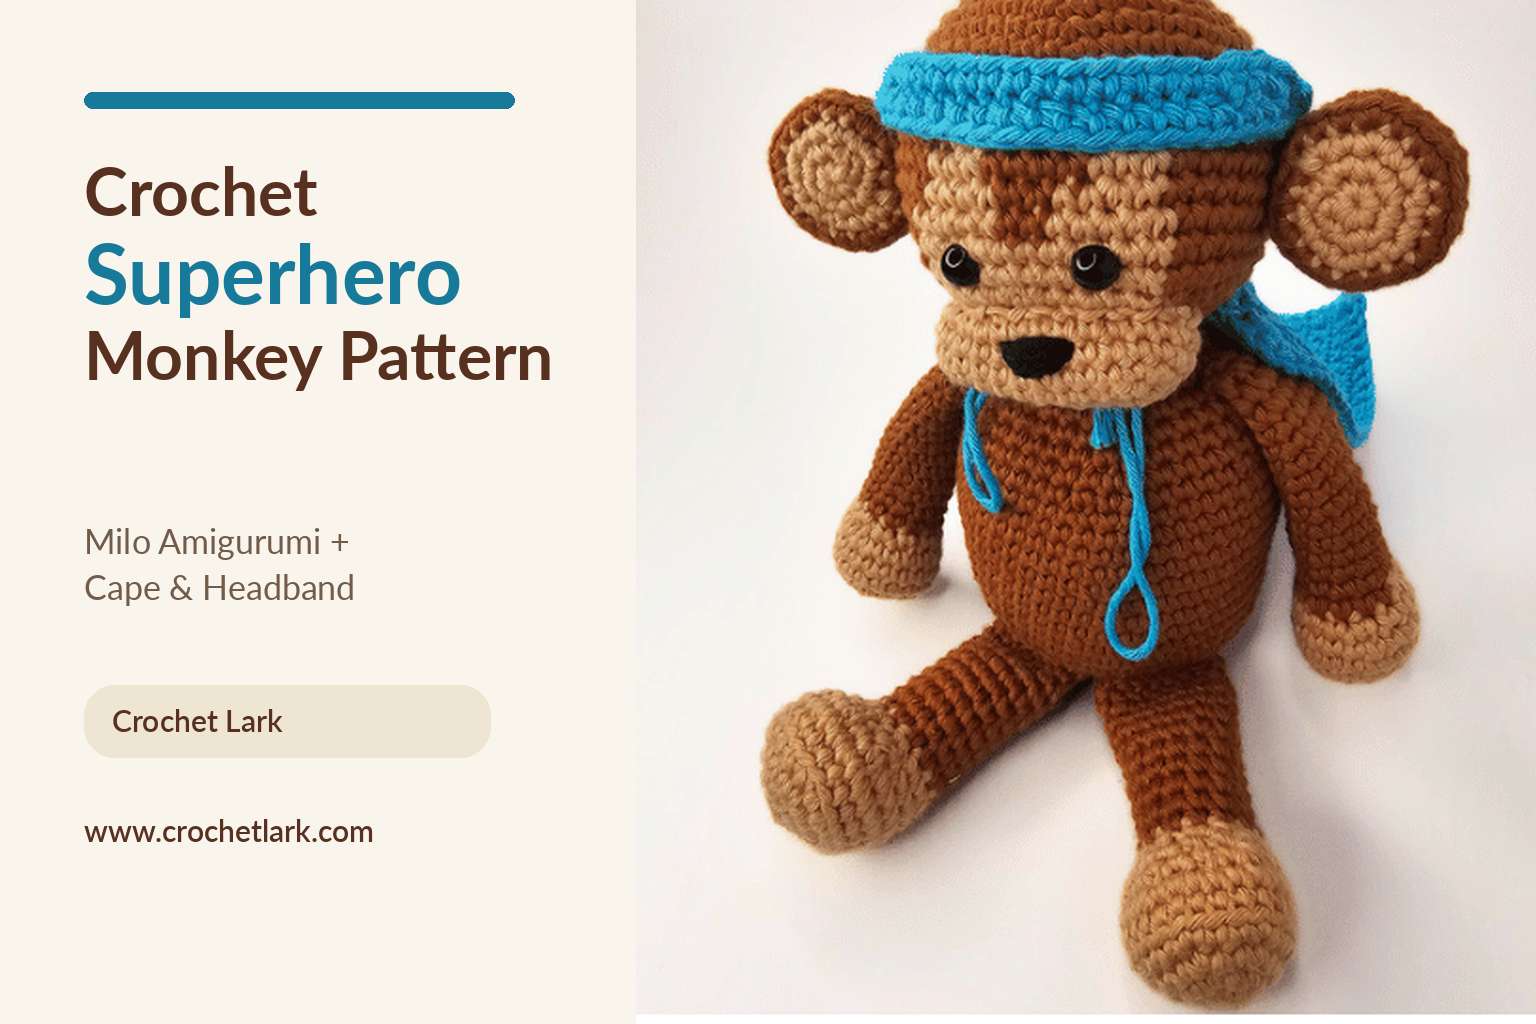
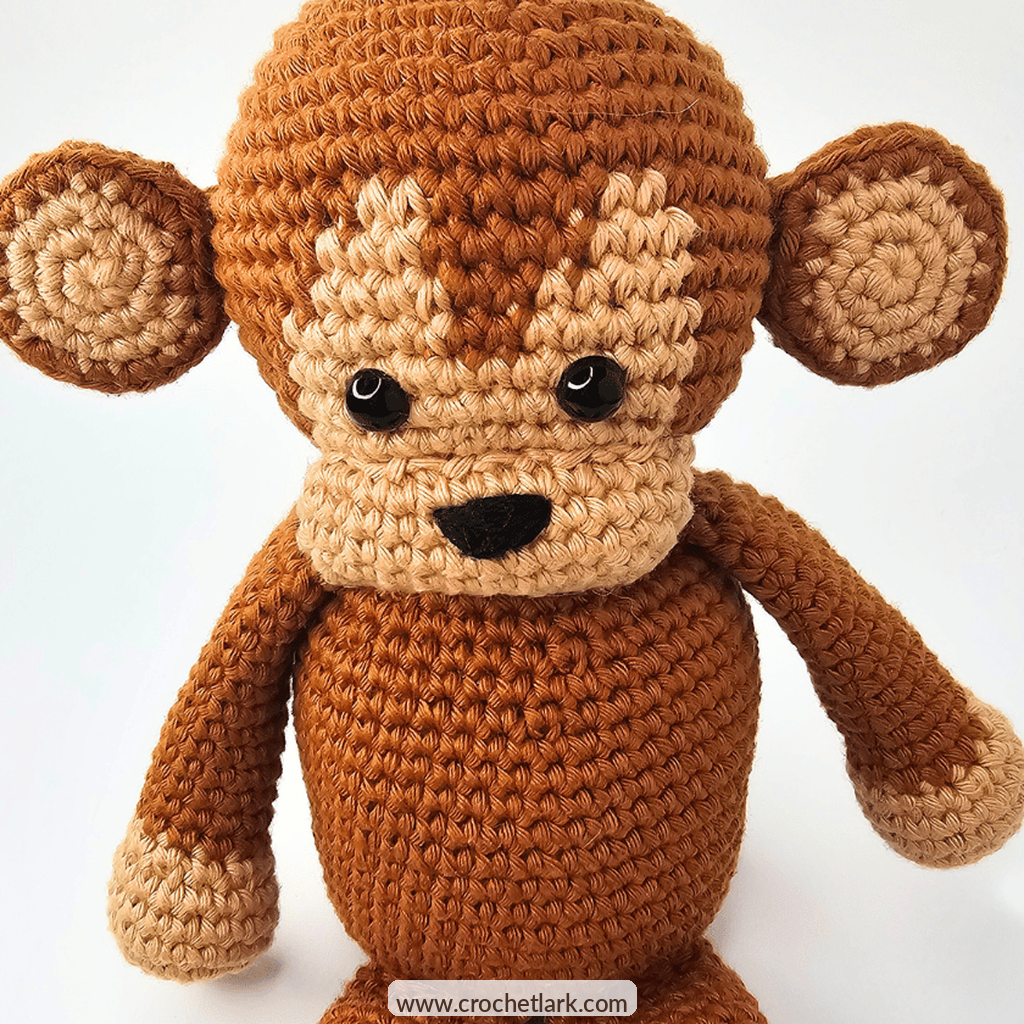
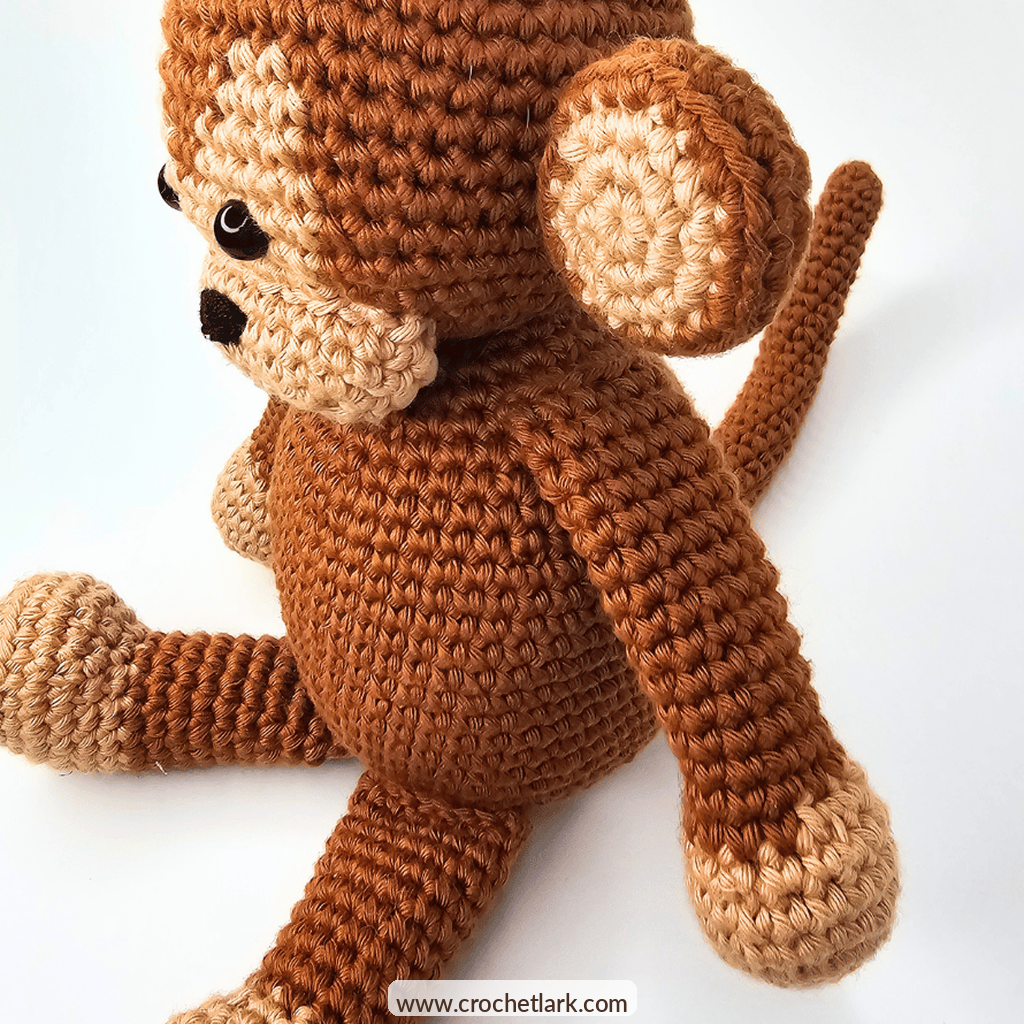
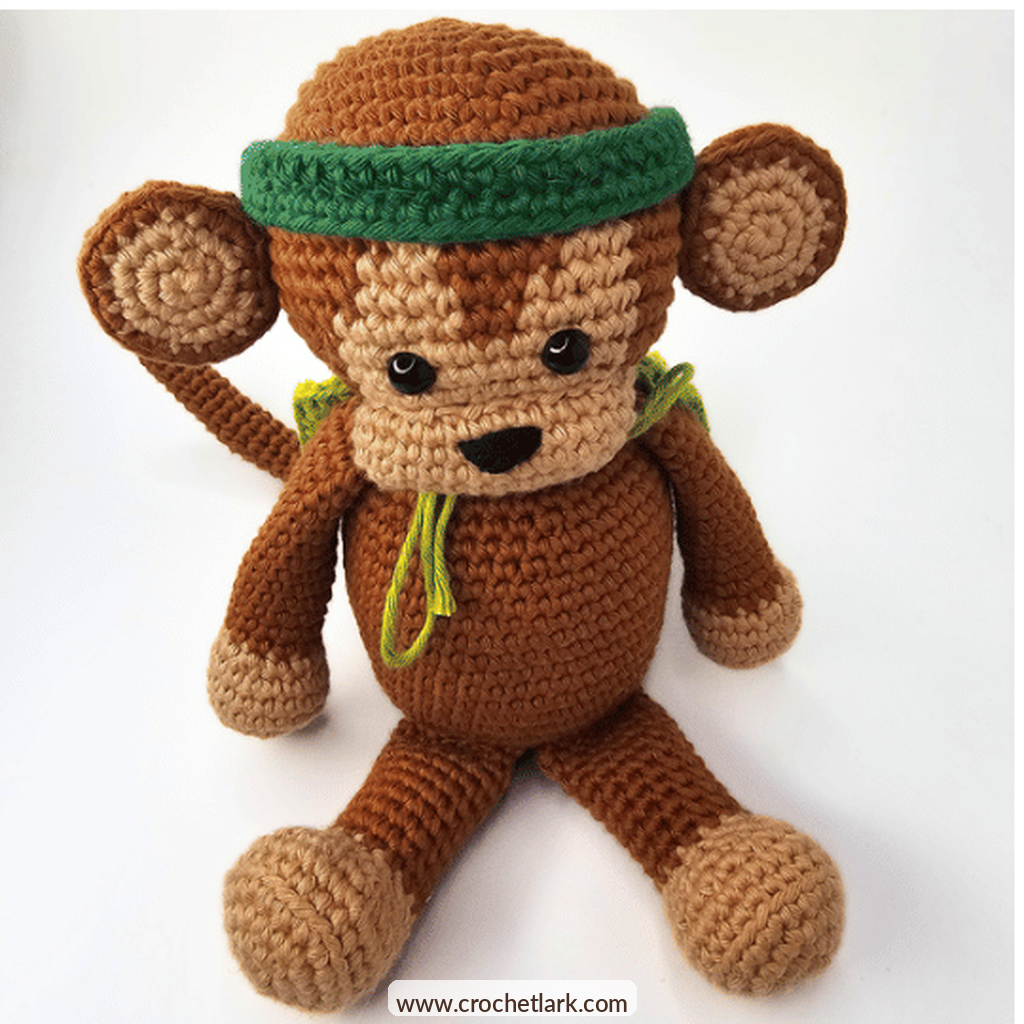
This crochet superhero monkey turns a sweet brown amigurumi into a tiny caped hero. Milo has a rounded body, long arms and legs, oversized ears, a curled tail, and a contrasting light-brown face that gives him plenty of personality.
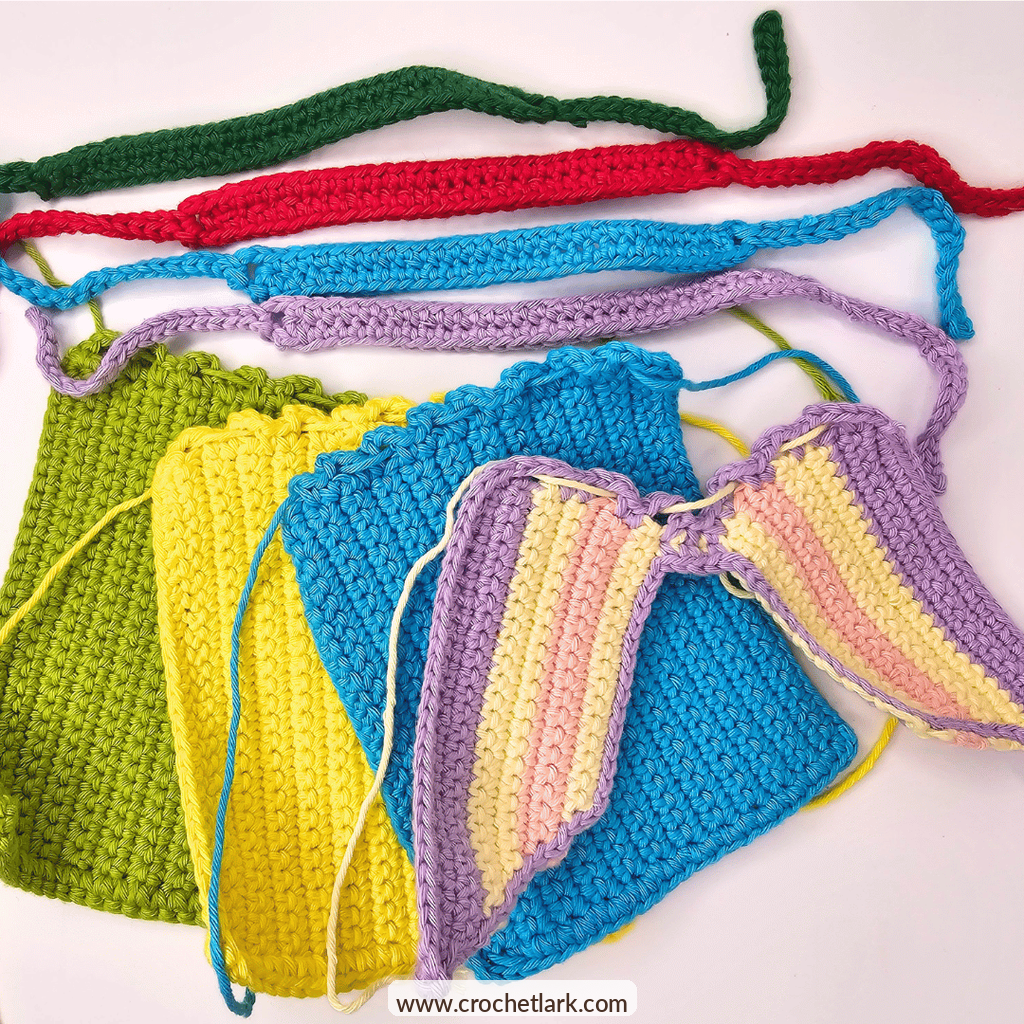
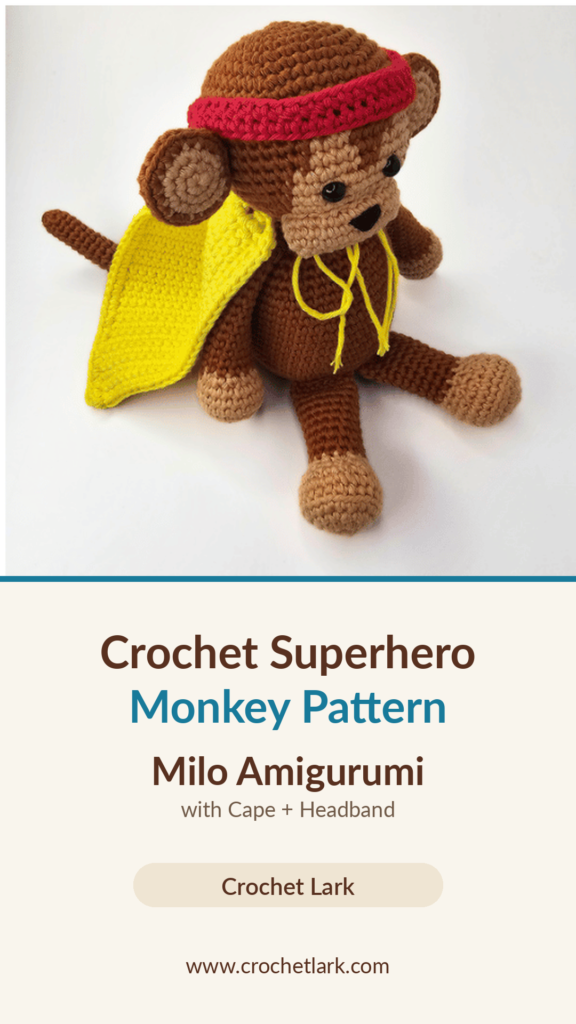
The superhero accessories are made separately, so the cape and headband can be removed whenever you like. You can make one complete costume or crochet several color combinations for dress-up play.
The original project combines the Milo the Monkey base pattern with the separate toy superhero costume pattern. Milo is rated intermediate mainly because of the color changes used to shape his face, while the costume itself uses straightforward rows of single crochet.
Quick Answer
Milo is crocheted from separate body, head, muzzle, ears, arms, legs, and tail pieces before being sewn together. A rectangular cape with a tie channel and a separate tie-on headband complete the superhero look.
Made with the referenced yarn and 3.5 mm hook, Milo measures approximately 22 cm / 8.6 inches tall and 13 cm / 5.1 inches wide.
Why You’ll Love This Project
- The cape and headband are removable.
- You can make several costumes for one monkey.
- Most of the pattern uses basic single crochet, increases, and decreases.
- The two-tone face gives Milo a distinctive amigurumi look.
- The costume sizing method can be adapted to other dolls and stuffed toys.
- The project makes a fun handmade gift or display piece.
Materials
For Milo the Monkey
- DK/light worsted cotton yarn:
- Color A – Caramel: 86 g / 129 m / 141 yd
- Color B – Nougat: 25 g / 37.5 m / 41 yd
- 3.5 mm (E) crochet hook
- Polyester fiberfill
- Yarn or tapestry needle
- Scissors
- Pins
- Stitch marker
- Two 8 mm safety eyes, or black yarn for embroidered eyes
- Black embroidery yarn or thread for the nose
For the Superhero Costume
- DK/light worsted yarn:
- Cape color: approximately 25 g / 37.5 m / 41 yd
- Headband color: approximately 3 g / 4.5 m / 5 yd
- 3.5 mm (E) crochet hook
- Yarn needle
- Scissors
- Pins
- Stitch marker
- Measuring tape
- Optional ribbon for the cape tie
The source project uses Hobbii Friends Cotton 8/8 and confirms these yarn amounts and tool sizes.
Finished Size
With the referenced yarn and a 3.5 mm hook:
Finished monkey: approximately 22 cm / 8.6 in high × 13 cm / 5.1 in wide.
The original designer notes that she crochets tightly, so your finished monkey may be slightly larger depending on your tension.
For the superhero costume, the verified Milo measurements are:
- Back width: 7.5 cm / 3 in
- Back height: 10 cm / 4 in
- Head circumference: 23 cm / 9 in
Gauge
Gauge is not essential for the amigurumi or costume, but the reference gauge is:
- 11 single crochet stitches = 5 cm / 1.96 in
- 11 rows = 5 cm / 1.96 in
Abbreviations
- R – round or row
- st / sts – stitch / stitches
- ch – chain
- sl st – slip stitch
- mc – magic circle
- sc – single crochet
- inc – increase; work 2 sc in one stitch
- dec – decrease
- FLO – front loop only
- BLO – back loop only
- ccA – change to Color A
- ccB – change to Color B
- [ ] × N – repeat the instructions inside the brackets N times
- (N) – stitch count at the end of the round
US crochet terminology is used throughout.
Before You Begin
Work the amigurumi pieces in continuous rounds unless the instructions specifically tell you to join. Place a stitch marker in the first stitch of every round and move it upward as you work.
Stuff the body and head firmly. The hands and feet should also be firm, but the upper arms and legs require lighter stuffing so they remain flexible.
For the face color changes, complete the final yarn-over of the stitch immediately before the change using the new color. This creates a cleaner transition.
Invisible decreases are useful throughout because they help keep the surface of the amigurumi neat.
Important Pattern Notes
Two discrepancies are present in the published technical information and are clearly identified here rather than silently changed.
Legs R2–R4: the source prints ×2, but the stated stitch totals of 12, 18, and 24 cannot be reached from the preceding rounds using only two repeats. Mathematically, six repeats would produce the printed totals. The workable interpretation is therefore shown as ×6, with the original discrepancy documented.
Headband sizing: the source gives the formula head circumference ÷ 3, but its Milo example uses 23 cm ÷ 2 = 11.5 cm and 9 in ÷ 2 = 4.5 in. For Milo, this article uses the documented 11.5 cm / 4.5 in example and recommends checking the headband against the toy before finishing.
Crochet Instructions
Body
Use Color A – Caramel.
Stuff firmly as you work.
R1: 6 sc in mc. (6)
R2: Inc around. (12)
R3: [1 sc, inc] ×6. (18)
R4: [2 sc, inc] ×6. (24)
R5: [3 sc, inc] ×6. (30)
R6: [4 sc, inc] ×6. (36)
R7: [5 sc, inc] ×6. (42)
R8: [6 sc, inc] ×6. (48)
R9–R20: Sc around. (48) — 12 rounds
R21: [6 sc, dec] ×6. (42)
R22: Sc around. (42)
R23: [5 sc, dec] ×6. (36)
R24: Sc around. (36)
R25: [4 sc, dec] ×6. (30)
R26: Sc around. (30)
R27: [3 sc, dec] ×6. (24)
R28: [2 sc, dec] ×6. (18)
Finish stuffing the body firmly.
Fasten off, leaving a long yarn tail for attaching the head.
Head
Begin with Color A – Caramel. You will also need Color B – Nougat for the facial markings.
Stuff throughout.
R1: 6 sc in mc. (6)
R2: Inc around. (12)
R3: [1 sc, inc] ×6. (18)
R4: [2 sc, inc] ×6. (24)
R5: [3 sc, inc] ×6. (30)
R6: [4 sc, inc] ×6. (36)
R7: [5 sc, inc] ×6. (42)
R8: [6 sc, inc] ×6. (48)
R9–R11: Sc around. (48)
Begin the facial color changes.
R12: 19 sc A, change to B, 2 sc B, change to A, 4 sc A, change to B, 2 sc B, change to A, 21 sc A. (48)
R13: 18 sc A, 3 sc B, 4 sc A, 3 sc B, 20 sc A. (48)
R14: 18 sc A, 4 sc B, 2 sc A, 4 sc B, 20 sc A. (48)
R15: 17 sc A, 5 sc B, 2 sc A, 5 sc B, 19 sc A. (48)
R16: 17 sc A, 12 sc B, 19 sc A. (48)
R17: 17 sc A, 12 sc B, 19 sc A. (48)
R18: [6 sc, dec] ×2, 1 sc A, change to B, 5 sc, dec, 6 sc, change to A, dec, [6 sc, dec] ×2. (42)
R19: [5 sc, dec] ×2, 2 sc A, change to B, 3 sc, dec, 5 sc, dec, change to A, [5 sc, dec] ×2. (36)
R20: [4 sc, dec] ×2, 2 sc A, change to B, 2 sc, dec, 4 sc, dec, change to A, [4 sc, dec] ×2. (30)
If using safety eyes, insert them between R16 and R17, leaving approximately five stitches between the eyes.
R21: [3 sc, dec] ×6. (24)
Begin adding additional stuffing.
R22: [2 sc, dec] ×6. (18)
R23: [1 sc, dec] ×6. (12)
Finish stuffing firmly.
R24: Dec around. (6)
Fasten off. Thread the yarn tail through the front loops of the remaining six stitches and pull firmly to close the opening.
Weave the end inside the head.
Muzzle / Mouth Piece
Use Color B – Nougat.
This section is worked around both sides of a foundation chain. Do not stuff yet.
Foundation: Ch 11.
R1: Beginning in the second ch from the hook, work 2 sc in the first ch, sc in the next 8 chains, 2 sc in the final chain.
Continue around the opposite side of the foundation chain: 2 sc in the next chain, sc in the next 8 chains, 2 sc in the last chain. Join with a sl st. (24)
R2: Ch 1. Work 2 sc in the same stitch as the join, sc in the next 10 sts, 2 sc in the next st, sc in the next 12 sts. Join. (26)
R3: Ch 1, sc around, join. (26)
R4: Ch 1, sc around, join. (26)
Fasten off and leave a long yarn tail for sewing.
Ears – Make 2
Start with Color B – Nougat.
Do not stuff.
R1: 6 sc in mc. (6)
R2: Inc around. (12)
R3: [1 sc, inc] ×6. (18)
Change to Color A – Caramel.
R4: [2 sc, inc] ×6. (24)
R5: BLO sc around. (24)
R6: [2 sc, dec] ×6. (18)
R7: [1 sc, dec] ×6. (12)
R8: Dec around. (6)
Fasten off with a long sewing tail.
Thread the tail through the front loops of the remaining stitches and pull closed.
Make a second ear in the same way.
Arms – Make 2
Begin with Color B – Nougat.
R1: 6 sc in mc. (6)
R2: Inc around. (12)
R3: [1 sc, inc] ×6. (18)
R4–R6: Sc around. (18)
R7: [1 sc, dec] ×6. (12)
Change to Color A – Caramel.
R8–R12: Sc around. (12)
Stuff the hand firmly and add only a small amount of stuffing through the lower arm.
Do not continue stuffing beyond this point.
R13–R21: Sc around. (12)
R22: Flatten the opening. Ch 1, then work 6 sc through both layers to close the arm. (6)
Fasten off with a long sewing tail.
Make the second arm.
Legs – Make 2
Begin with Color B – Nougat.
R1: 6 sc in mc. (6)
Rounds 2–4 Source Discrepancy
The source prints ×2 for these three rounds while giving totals that require six repeats.
To obtain the stated stitch totals, work:
R2: Inc ×6. (12)
R3: [1 sc, inc] ×6. (18)
R4: [2 sc, inc] ×6. (24)
This ×6 interpretation is mathematical rather than independently verified, and is shown explicitly because the published instructions conflict with their stitch totals.
Continue:
R5: BLO sc around. (24)
R6: Sc around. (24)
R7: 6 sc, [dec, 1 sc] ×4, 6 sc. (20)
R8: 4 sc, [1 sc, dec] ×4, 4 sc. (16)
R9: 5 sc, [dec, 1 sc] ×2, 5 sc. (14)
Change to Color A – Caramel.
R10–R14: Sc around. (14)
Stuff the foot firmly. Continue stuffing the leg lightly.
R15–R18: Sc around. (14)
Finish adding light stuffing.
R19: Flatten the opening. Ch 1 and work 7 sc through both layers. (7)
If necessary, slightly adjust where you flatten the piece so the closed upper edge sits horizontally in relation to the foot.
Fasten off with a long sewing tail.
Make the second leg.
Tail
Use Color A – Caramel.
Stuff firmly as you work.
R1: 6 sc in mc. (6)
R2: [Inc, 2 sc] ×2. (8)
R3–R31: Sc around. (8) — 29 rounds
Fasten off with a long sewing tail.
Assembly
Use pins to check the placement of every piece before sewing.
Attach the Muzzle
Position the muzzle across approximately R18–R22 of the head, centered over the lighter facial section.
Begin sewing the muzzle to the face.
When approximately half of the seam has been completed, add stuffing to give the muzzle a firm rounded shape.
Finish sewing securely.
Attach the Ears
Position one ear on each side of the head.
The ears should sit at a slight angle around R12–R15 with the lighter centers facing forward.
Sew approximately four stitches of each ear securely to the head.
Attach the Head
Place the head on the body with a slight forward angle.
The front of the head around R23–R24 connects to the body, while the back sits approximately around R21–R22.
Pin first, check the position from the front and side, then sew securely around the neck.
Attach the Arms
Place the arms around R25–R26 of the body.
Leave approximately 9 stitches between the arms across the front.
Pin both arms before sewing so they sit at the same height.
Sew securely.
Attach the Legs
Position the legs around R7–R8 of the body.
Leave approximately one stitch between the legs at the front.
Check that Milo can sit naturally before sewing both legs firmly in place.
Attach the Tail
Position the tail at the center back of the body, approximately between R6 and R10.
Sew the base securely while allowing the remainder of the tail to curve naturally.
Embroider the Nose
Using black embroidery yarn or thread, embroider a small nose across the upper center of the muzzle.
Build up several stitches until the nose is solid and neatly shaped.
The verified assembly placements above correspond to the original Milo construction.
Crochet Superhero Cape
The cape is sized from the monkey rather than from a fixed stitch count.
For Milo, the reference measurements are:
Back height: 10 cm / 4 in
Back width: 7.5 cm / 3 in
Calculate the Cape Size
Use:
Back height × 1.5 = cape length
For Milo:
10 cm × 1.5 = 15 cm
or:
4 in × 1.5 = 6 in
Next calculate:
Back width × 1.25 = cape width
For Milo:
7.5 cm × 1.25 = 9.38 cm
or:
3 in × 1.25 = 3.75 in.
Cape Instructions
Use your chosen cape color.
Foundation: Chain until the foundation chain reaches the required cape length. Include the loop on the hook when measuring.
For Milo, aim for approximately 15 cm / 6 in.
R1: Beginning in the second ch from the hook, sc across. Ch 1 and turn.
R2: Sc across. Ch 1 and turn.
Repeat R2 until the total width of the rows reaches the calculated cape width.
For Milo, aim for approximately 9.4 cm / 3.75 in.
Do not fasten off.
Record the total number of rows because you will need this figure to create the tie openings.
Create the Cape Tie Openings
Calculate:
Number of cape rows ÷ 3 = number of stitch markers
Round to the nearest whole number if necessary.
The source’s Milo example has 21 rows, giving:
21 ÷ 3 = 7 stitch markers
Evenly position the markers along the short edge closest to your hook.
Count the number of rows between your hook and the first marker.
Chain one more than that number, then sl st into the marked space.
For example, if there are two rows between the hook and marker, ch 3 before making the sl st.
Repeat across the edge until you reach the final marker.
After the final opening, chain one more than the number of rows remaining to the corner, then sc into the next stitch along the long edge.
Continue working sc evenly around the remaining three sides of the cape.
Work 2 sc into each corner to keep the edging flat.
When you return to the beginning, join with a sl st.
Fasten off and weave in all ends.
Add the Cape Tie
Cut a piece of yarn approximately two to three times the width of the cape.
Thread it through the openings along the top edge.
Leave enough yarn at both ends to tie comfortably around Milo.
Ribbon can be used instead of yarn if preferred.
Crochet Superhero Headband
Measure around the monkey’s head before beginning.
For Milo, the reference head circumference is:
23 cm / 9 in
Important Sizing Conflict
The written source formula says:
Head circumference ÷ 3 = starting chain length
However, the worked Milo example directly underneath uses:
23 cm ÷ 2 = 11.5 cm
and:
9 in ÷ 2 = 4.5 in
Because those two instructions conflict, this article does not silently choose one as universally correct.
For the Milo-size monkey, the documented example gives a starting chain length of approximately 11.5 cm / 4.5 in. Check this measurement physically around your finished monkey before continuing.
Headband Instructions
Use your chosen headband color.
Chain until the foundation measures approximately 11.5 cm / 4.5 in for Milo, including the loop on your hook.
R1: Beginning in the second chain from the hook, sc in each chain across.
At the end of the foundation chain, ch 3.
Turn the work so you can crochet along the opposite side of the foundation chain.
Sc into each stitch along the opposite side.
At the opposite end, ch 3 again.
Join to the first sc with a sl st.
Fasten off and weave in the ends.
First Headband Tie
Attach yarn into the chain space at one end of the headband.
Chain until this new strap reaches the same target chain length used for the central headband section.
Starting in the second chain from the hook, sl st into every chain back toward the headband.
Sl st into the original chain space.
Fasten off and weave in the end.
Second Headband Tie
Repeat the same instructions in the chain space at the opposite end.
The two narrow straps can now be tied together behind the monkey’s head.
Dressing Your Superhero Monkey
Place the cape against Milo’s back.
Bring the two ends of the cape tie around the upper body or neck area and tie securely without pulling tightly against the toy.
Place the headband across the forehead above the eyes.
Take both narrow straps around the back of the head and tie them together.
The costume remains removable, making it possible to crochet several cape and headband combinations for the same monkey. The original superhero concept was designed around four elemental monkey characters, but the costume pieces can also simply be used as interchangeable dress-up accessories.
Helpful Notes
Check your stitch count frequently, especially while working the head. The face contains several color changes combined with shaping, so catching a missed stitch early will save time later.
Keep amigurumi tension firm enough that the stuffing cannot be seen between stitches. If you substitute a different yarn weight, choose a hook that creates a similarly dense fabric.
Pin the muzzle, ears, arms, legs, and tail before sewing. Small changes in placement can noticeably change Milo’s expression and sitting position.
Do not overstuff the upper arms or legs. Keeping these areas softer allows the limbs to hang and sit more naturally.
When making the superhero cape, slightly exceeding the calculated measurements is preferable to making the cape too small.
Because the published headband sizing formula conflicts with its worked example, always test the band around the finished head before completing both ties.
For toys intended for children under three, embroidered eyes are recommended instead of plastic safety eyes because small components may present a choking hazard.
FAQ
Is this crochet superhero monkey suitable for beginners?
The individual stitches are simple, but the head uses several planned color changes. The original Milo pattern is therefore rated intermediate and is most suitable for confident beginners who already understand single crochet, increases, decreases, working in continuous rounds, and changing colors.
How large is the finished monkey?
Using the referenced yarn with a 3.5 mm crochet hook, Milo measures approximately 22 cm / 8.6 inches high and 13 cm / 5.1 inches wide. Your result may vary with yarn, hook size, and tension.
Can I use another type of yarn?
Yes. Changing the yarn weight or fiber will change the finished dimensions. Select an appropriate hook that produces a dense amigurumi fabric with minimal gaps.
Do I have to make the superhero costume?
No. Milo is a complete monkey amigurumi without the accessories. The cape and headband are separate removable pieces.
Can I make several superhero costumes for one monkey?
Yes. This is one of the most useful features of the project. You can make one Milo and crochet several removable cape and headband sets in different colors.
Is the cape worked in rounds?
No. The main cape is worked flat in back-and-forth rows. The edge and tie openings are added afterward.
What should I do about the leg instructions?
The published R2–R4 repeats conflict with their stated stitch totals. The source prints ×2, but reaching 12, 18, and 24 stitches from the preceding rounds mathematically requires ×6. This article clearly identifies that correction as an interpretation rather than presenting it as verified original wording.
Why is there a warning about the headband measurement?
The source provides two contradictory calculations: its written formula divides the head circumference by three, while the Milo example divides it by two. For Milo, the worked example gives 11.5 cm / 4.5 inches. Test the band against the finished toy before completing it.
Can I embroider the eyes?
Yes. Black yarn or embroidery thread can be used instead of safety eyes, and embroidered eyes are the safer choice for toys intended for very young children.
Final Thoughts
This crochet superhero monkey combines a detailed amigurumi character with simple removable accessories, giving you plenty of ways to customize the finished project.
Make Milo in the classic caramel and nougat combination, then experiment with different superhero cape and headband colors. One monkey can have an entire wardrobe of costumes, or you can make several superheroes for a colorful handmade collection.