
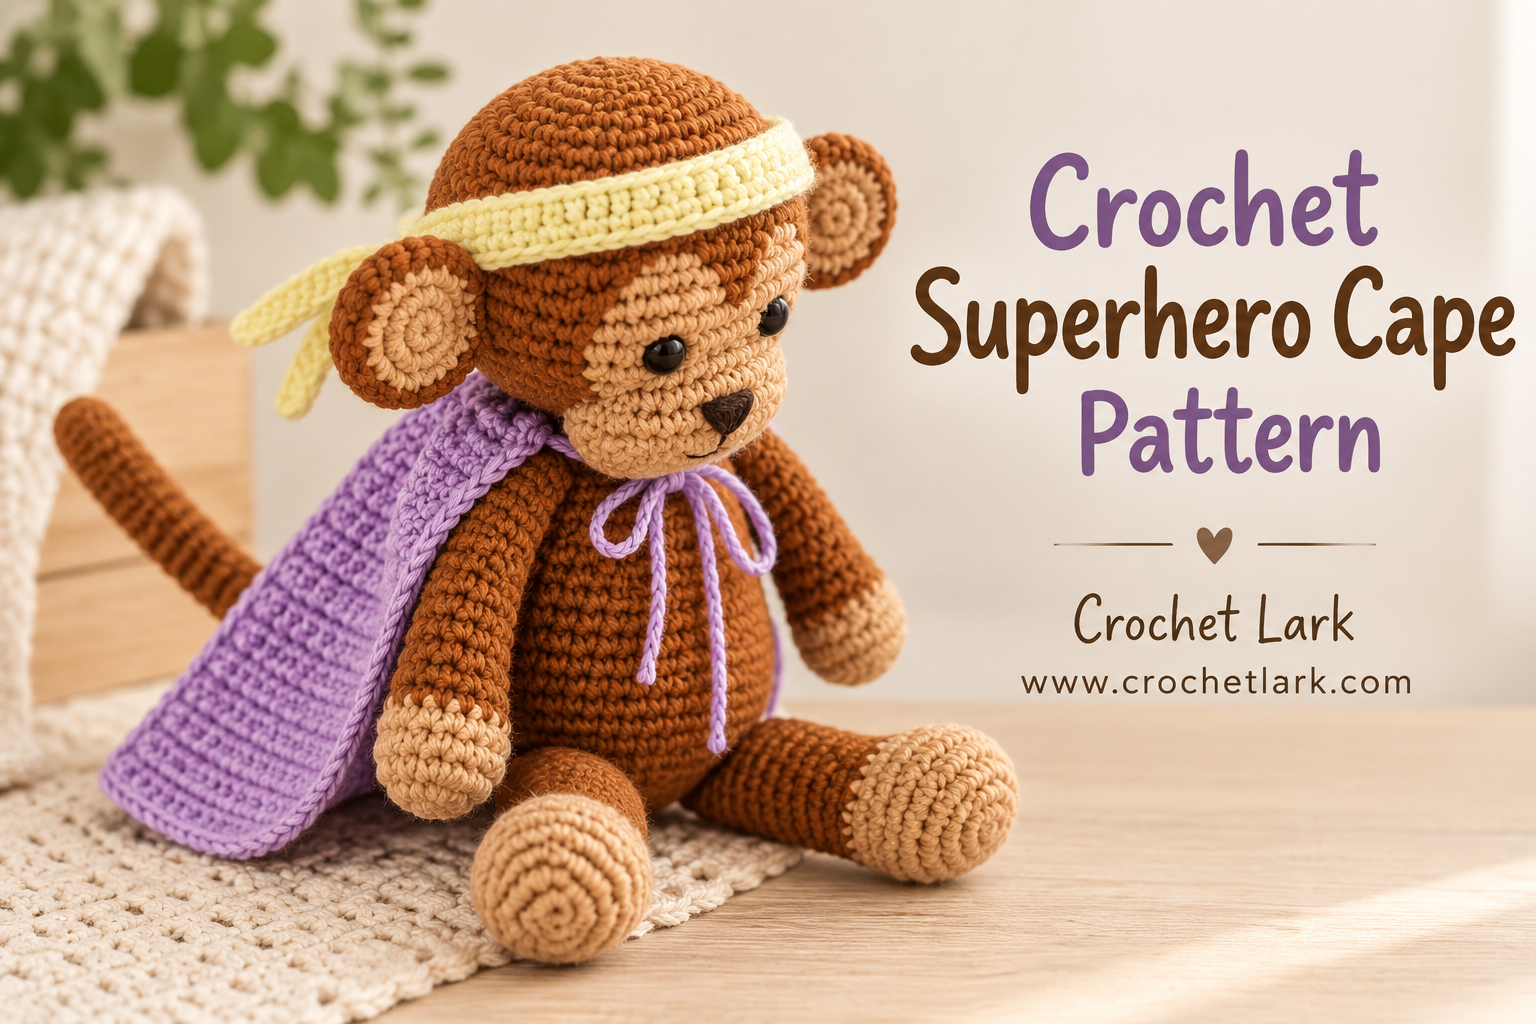
Give a favorite amigurumi, doll, or soft toy its own superhero makeover with this crochet cape and matching headband. The design is simple, colorful, and especially useful because the size is calculated from the toy you are dressing rather than from fixed stitch counts.
The cape is worked flat in single crochet, finished with a neat border, and given openings across the upper edge for a yarn or ribbon tie. A coordinating crochet headband completes the superhero costume.
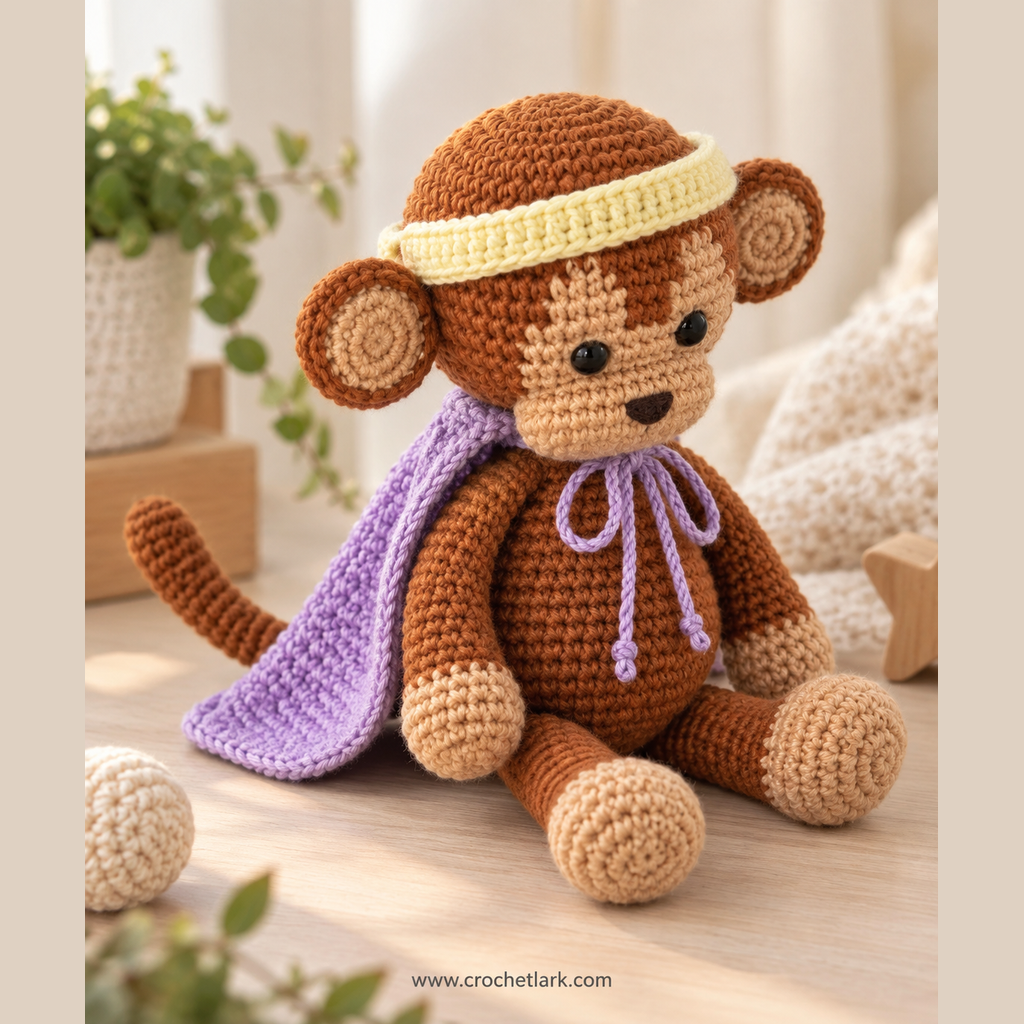
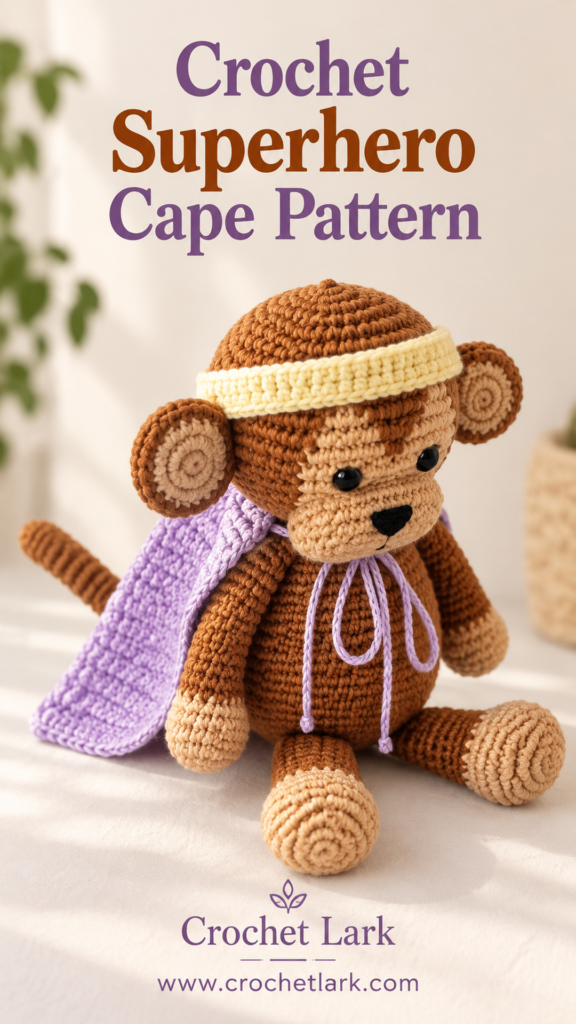
The original project uses a purple cape and yellow headband, but you can easily choose your own superhero color combination. The pattern is rated easy and is designed to work with different sizes of toys.
Quick Answer
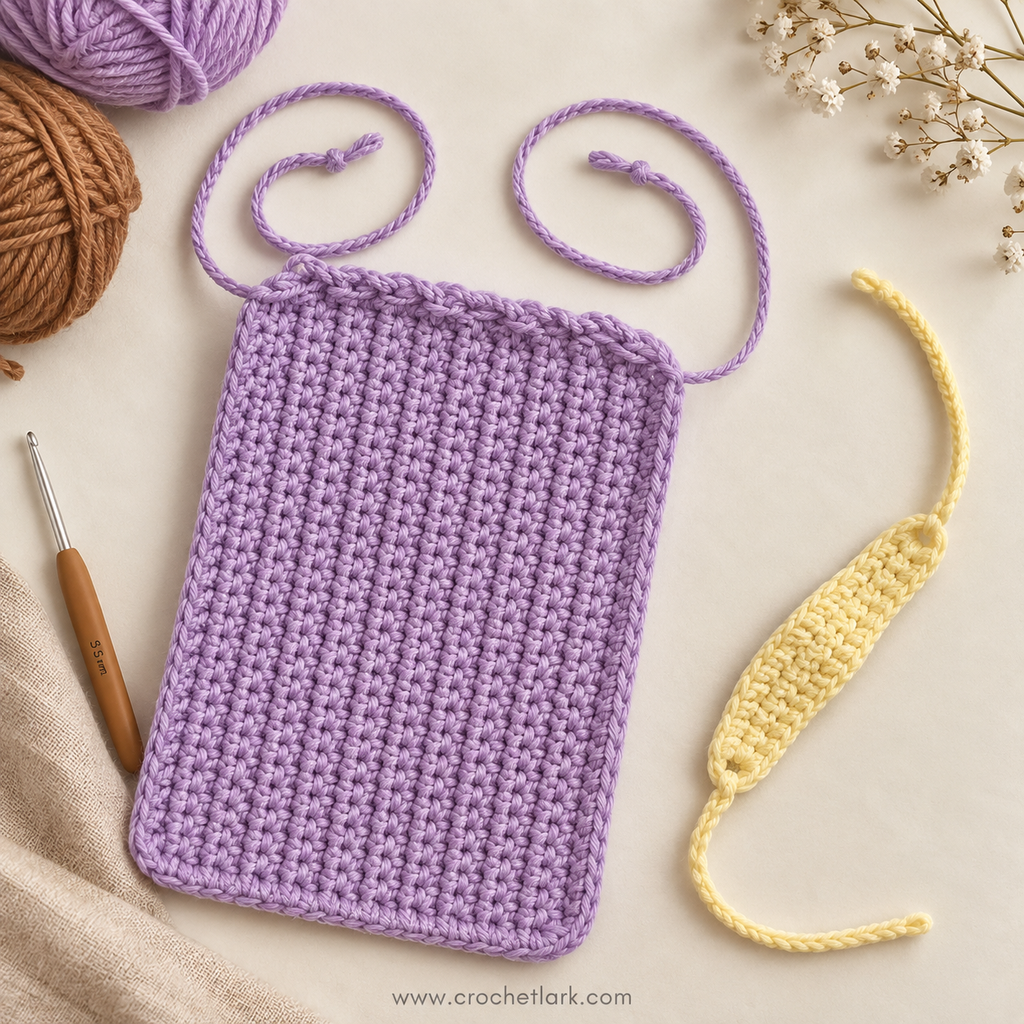
This crochet superhero costume contains two pieces:
- A rectangular single-crochet cape with a tie threaded through openings at the top.
- A matching headband with a wider center section and narrow crocheted ties at both ends.
You first measure the toy, calculate the required dimensions, and then crochet each piece to those measurements. The source pattern uses DK/light worsted yarn with a 3.5 mm crochet hook.
Why You’ll Love This Project
- The sizing can be adapted to different amigurumi, dolls, and soft toys.
- Most of the project uses basic single crochet.
- Only small amounts of yarn are required.
- It is a fun way to use leftover yarn.
- The colors can be customized for different superhero themes.
- The costume is removable, so one toy can have several different outfits.
Materials
For the original example you will need:
- DK/light worsted yarn in Color A for the cape
- DK/light worsted yarn in Color B for the headband
- Approximately 25 g / 37.5 m / 41 yd of Color A
- Approximately 3 g / 4.5 m / 5 yd of Color B
- 3.5 mm (E) crochet hook
- Yarn or tapestry needle
- Scissors
- Pins
- Stitch markers
- Measuring tape
- The amigurumi, doll, or soft toy you want to dress
- Ribbon, optional, for the cape tie
The original example was made with purple yarn for the cape and yellow yarn for the headband.
Finished Size
This is a made-to-measure crochet pattern, so there is no single finished size.
For the photographed example, the toy measurements were:
- Back width: 7.5 cm / 3 in
- Back height: 10 cm / 4 in
- Head circumference: 23 cm / 9 in
Using the cape calculations below, this gives an approximate cape measurement of:
- Cape width: 9.38 cm / 3.75 in
- Cape length: 15 cm / 6 in
These example measurements are provided in the source pattern.
Gauge
Gauge is not required because you crochet each piece to measurements.
The designer’s reference gauge is:
11 sc = 5 cm / 1.96 in
11 rows = 5 cm / 1.96 in
Abbreviations
This pattern uses US crochet terminology.
- R – Row or round
- st / sts – Stitch / stitches
- ch – Chain
- sl st – Slip stitch
- sc – Single crochet
- inc – Increase
- dec – Decrease
- [ ] x times – Repeat the instructions inside the brackets the stated number of times
- ( ) – Total stitch count where applicable
Before You Begin
The superhero costume is sized from measurements rather than fixed stitch counts.
You will need three measurements:
- Width of the toy’s back
- Height of the toy’s back
- Circumference of the toy’s head
Keep your measuring tape relaxed against the toy rather than stretching or compressing it.
The source also recommends allowing a little extra room rather than making the costume too small. Because different yarn weights and tensions produce different stitch sizes, work primarily from the finished measurements rather than trying to reproduce a specific number of stitches.
Calculate the Cape Length
Use:
Back height × 1.5 = cape length
Example:
10 cm × 1.5 = 15 cm
or:
4 in × 1.5 = 6 in
Calculate the Cape Width
Use:
Back width × 1.25 = cape width
Example:
7.5 cm × 1.25 = 9.38 cm
or:
3 in × 1.25 = 3.75 in
These are the calculations used by the source pattern.
Important Headband Calculation Note
There is a conflict in the original published instructions.
The formula is printed as:
Head circumference ÷ 3 = starting chain length
However, both worked examples immediately underneath use:
23 cm ÷ 2 = 11.5 cm
and:
9 in ÷ 2 = 4.5 in
Because both examples use ÷ 2, the Crochet Lark instructions below follow the worked examples and use half of the head circumference for the main headband section. The inconsistency is being identified here rather than silently changing the original technical information.
Crochet Instructions
Cape
Using Color A:
Starting Chain
Chain until the chain reaches your calculated cape length.
Include the active loop on your hook when checking the measurement.
Row 1
Starting in the 2nd ch from the hook, sc in each ch across.
Ch 1 and turn.
Row 2
Sc in each st across.
Ch 1 and turn.
Remaining Rows
Repeat Row 2 until the total width of your crocheted rectangle approximately matches your calculated cape width.
Keep track of exactly how many rows you have completed.
Do not fasten off.
The cape body is now complete.
Creating the Cape Tie Openings
Turn your work so you can crochet along the nearest short edge of the cape.
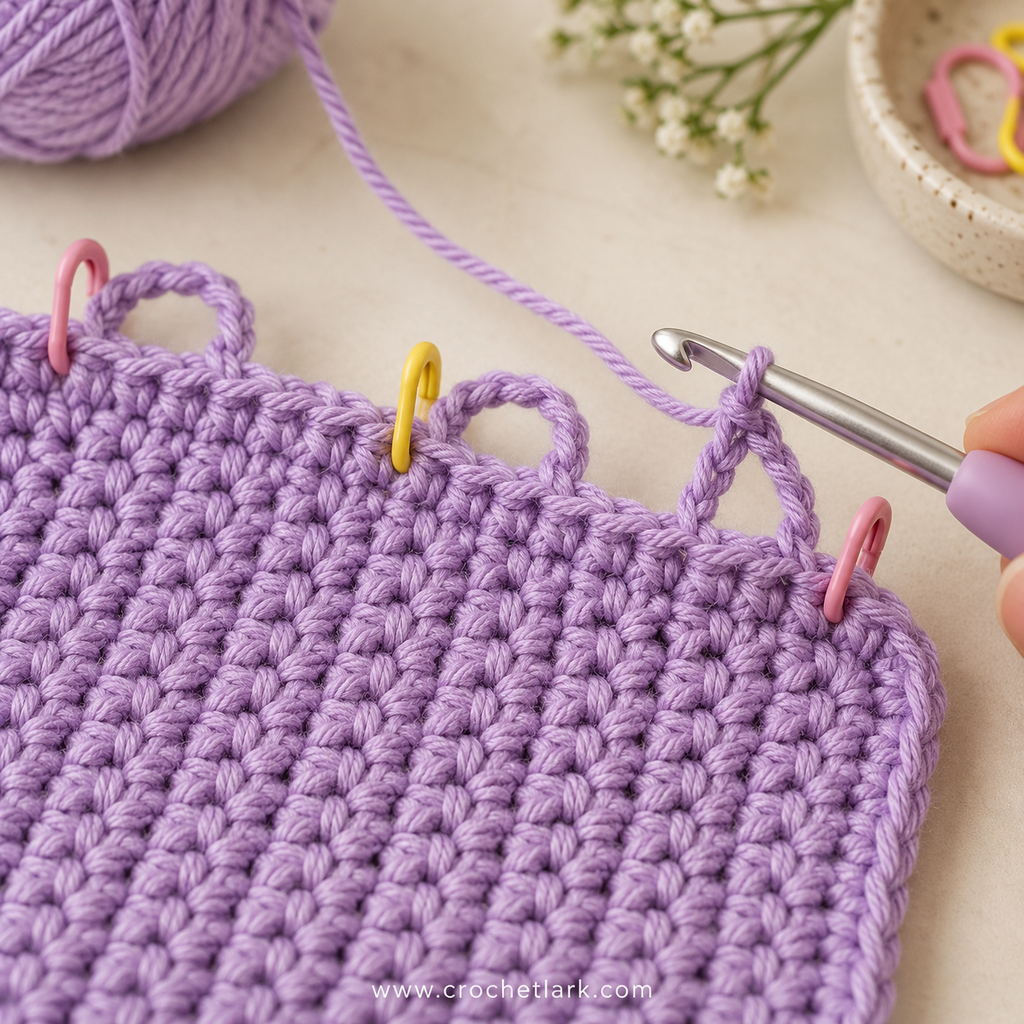
You first need to calculate how many stitch markers to place.
Use:
Number of cape rows ÷ 3 = number of stitch markers
If the result contains a decimal, round it to the nearest whole number.
Example
If you crocheted 21 rows:
21 ÷ 3 = 7 stitch markers
Place the calculated number of stitch markers evenly across the short edge closest to your hook.
First Tie Opening
Count the number of row spaces between the hook and the first stitch marker.
Chain one more than that number.
Then sl st into the space containing the stitch marker.
Example
If there are 2 row spaces between your hook and the next marker:
Ch 3, then sl st into the marked space.
Remaining Tie Openings
Continue across the edge using the same method.
For each section:
- Count the row spaces before the next marker.
- Chain one more than that number.
- Sl st into the marked space.
Repeat until you reach the final stitch marker.
After the last marker, count the remaining row spaces before the long side of the cape.
Chain one more than the number of remaining spaces.
Then sc into the next available stitch on the adjacent long edge.
Cape Edging
Continue crocheting around the other three edges of the cape.
Work sc evenly around the edges.
At each corner:
Work 2 sc into the corner stitch.
Continue until you return to the starting point.
Join with a sl st into the first chain.
Cut the yarn and fasten off.
Use a tapestry needle to securely weave in the yarn ends.
Cape Tie
Cut a separate strand of Color A approximately:
2–3 times the width of your finished cape.
Thread the strand onto a tapestry needle.
Weave it alternately through the openings you created along the upper edge of the cape.
Center the strand so approximately equal lengths remain on both sides.
These ends become the ties used to secure the cape around the toy.
You can substitute a piece of ribbon for the yarn tie if preferred.
Headband
Using Color B.
Calculate the Starting Length
Following the worked examples from the original pattern:
Head circumference ÷ 2 = starting chain length
Example:
23 cm ÷ 2 = 11.5 cm
or:
9 in ÷ 2 = 4.5 in
This measurement forms the wider center section of the headband.
Starting Chain
Chain until your chain reaches the calculated headband length.
Include the active loop on your hook when measuring.
Headband Row/Round 1
Starting in the 2nd ch from the hook, work:
1 sc in each ch across.
When you reach the end of the foundation chain:
Ch 3.
Rotate the work so you can crochet along the opposite side of the foundation chain.
Work:
1 sc in each stitch along the opposite side of the chain.
At the opposite end:
Ch 3.
Join with a sl st into the first sc.
Cut the yarn and fasten off.
Weave in the ends.
First Headband Strap
Attach Color B into the ch-3 space at one end of the headband.
Chain until this new chain measures approximately the same length as the calculated headband starting length.
Starting in the 2nd ch from the hook, work:
Sl st in each ch back toward the headband.
When you reach the center headband section:
Sl st into the same ch-3 space where the strap began.
Cut the yarn and fasten off.
Weave in the yarn ends.
Second Headband Strap
Attach the yarn to the ch-3 space at the opposite end of the headband.
Repeat the same process:
- Chain until the strap reaches the calculated headband length.
- Starting in the 2nd ch from the hook, sl st back along every chain.
- Sl st into the ch-3 space.
- Cut the yarn.
- Fasten off.
- Weave in the ends.
Your headband should now have a wider central section with a narrow tie extending from each end.
Assembly
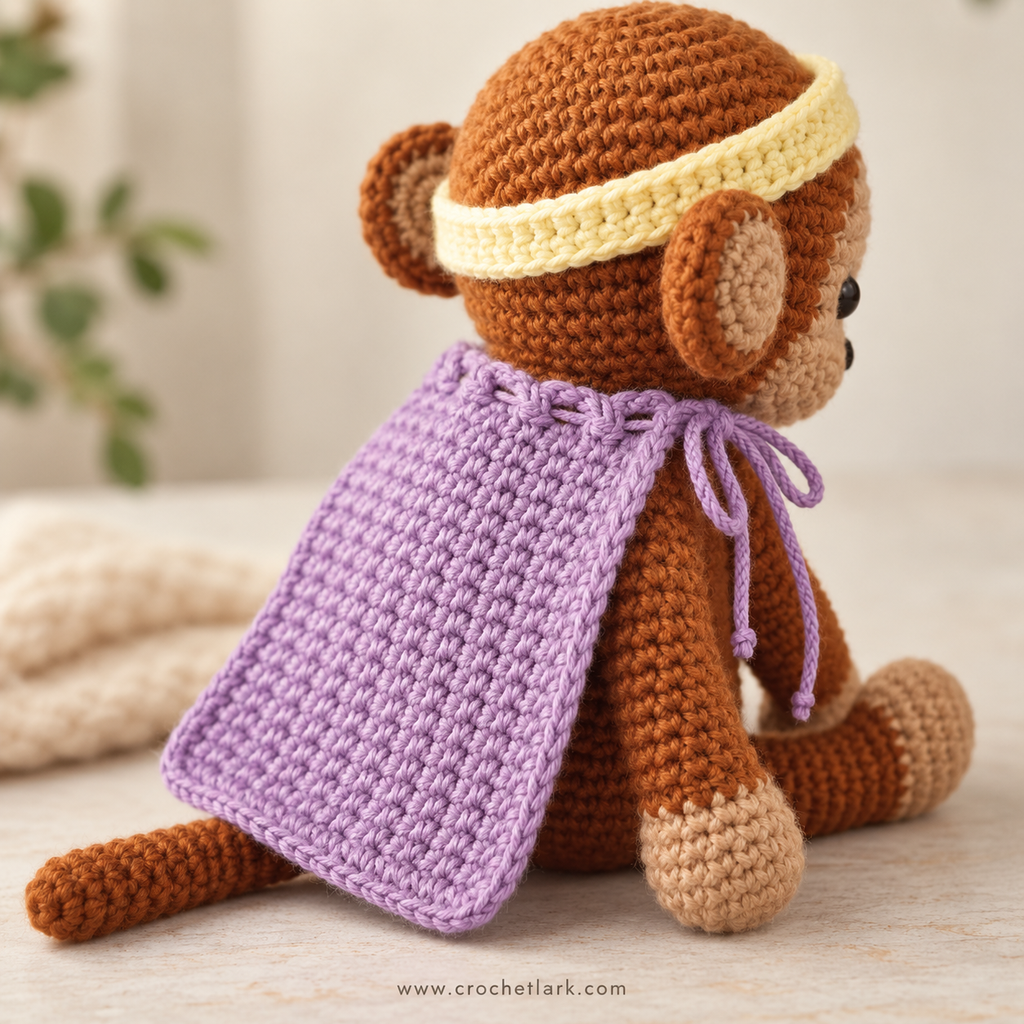
Attach the Cape
Place the cape against the toy’s back with the tie-opening edge positioned around the upper back or neck area.
Bring the two ends of the threaded yarn tie around the toy.
Tie them securely so the cape stays in place without pulling the crochet fabric too tightly.
Straighten the cape so it hangs evenly down the back.
Attach the Headband
Position the wider center portion of the headband across the toy’s forehead.
Take the two straps around the sides of the head.
Tie the straps together at the back of the head to secure the headband.
Adjust the headband until it sits evenly.
The original pattern uses this simple tie-on construction for both pieces, making the costume removable.
Finishing
Check the entire project and weave in any remaining yarn tails.
Make sure:
- The cape border lies reasonably flat.
- The cape tie moves freely through the openings.
- Both tie ends are long enough to secure the cape.
- The headband center sits comfortably across the toy’s forehead.
- Both headband straps reach the back of the head easily.
- The ties are secure but not excessively tight.
If your cape curls slightly after crocheting, gentle blocking may help the rectangle sit flatter. Use a blocking method appropriate for the fiber content of your yarn.
Helpful Notes
Work to Measurements
The exact number of chains and rows will vary depending on your yarn, hook, tension, and the size of the toy. That is intentional.
Follow the measurements rather than trying to reproduce the exact stitch or row count from the example.
Changing Yarn
You can use another yarn weight if desired, but changing the yarn may also require a different hook size.
A thicker yarn will normally reach the required dimensions with fewer stitches and rows, while a thinner yarn will generally require more.
Keep Track of the Cape Rows
Do not forget to count the cape rows.
The row total is required when calculating how many stitch markers to place along the upper edge.
Keep the Openings Even
Try to distribute the markers as evenly as possible. This helps the tie openings sit neatly across the cape and allows the fabric to gather more evenly when tied.
Make the Cape Slightly Larger if Necessary
If your measurements fall between rows or stitches, a slightly larger cape is preferable to one that is too short or narrow. This also follows the sizing guidance provided with the original design.
FAQ
Can I make this crochet superhero cape for any amigurumi?
Yes. The pattern was specifically developed as an adjustable costume that can be fitted to different amigurumi, dolls, and soft toys by measuring the individual toy first.
Is this an easy crochet project?
The source classifies the project as easy. The crochet stitches are simple, although you need to pay attention to measurements and calculations when customizing the size.
Do I need to match the gauge?
No. Gauge is not required because you work until the pieces reach your calculated measurements.
The reference gauge is 11 sc and 11 rows per 5 cm / 1.96 in.
Can I make the cape longer?
Yes. Increase the target cape length before making your starting chain.
You can also adjust the multiplier if you deliberately want a shorter or more dramatic cape, although doing so would be a customization rather than the dimensions specified by the source pattern.
Can I make the cape wider?
Yes. Continue repeating Row 2 until the rectangle reaches your preferred width.
For the original proportions, use:
Back width × 1.25
Can I use ribbon instead of yarn to tie the cape?
Yes. Ribbon is specifically listed as an optional alternative for the cape tie.
Why doesn’t this pattern give an exact starting-chain count?
The costume is designed to fit different toys. Because each toy can have different proportions, the cape and headband are crocheted to measurements rather than universal stitch counts.
What colors work well for a superhero costume?
Purple and yellow recreate the example shown here, but classic combinations such as red and blue, black and yellow, green and gold, or pink and purple can give the same pattern a completely different superhero look.
Final Thoughts
This crochet superhero cape pattern is a fun way to turn a handmade toy into a completely new character without changing the toy itself.
The measurement-based construction also makes the project especially versatile. Once you understand how to calculate the cape dimensions and headband size, you can use the same technique for different amigurumi, dolls, and plush toys.
Choose two contrasting colors, crochet the simple cape and headband, add the ties, and your tiny superhero is ready for its next adventure.