
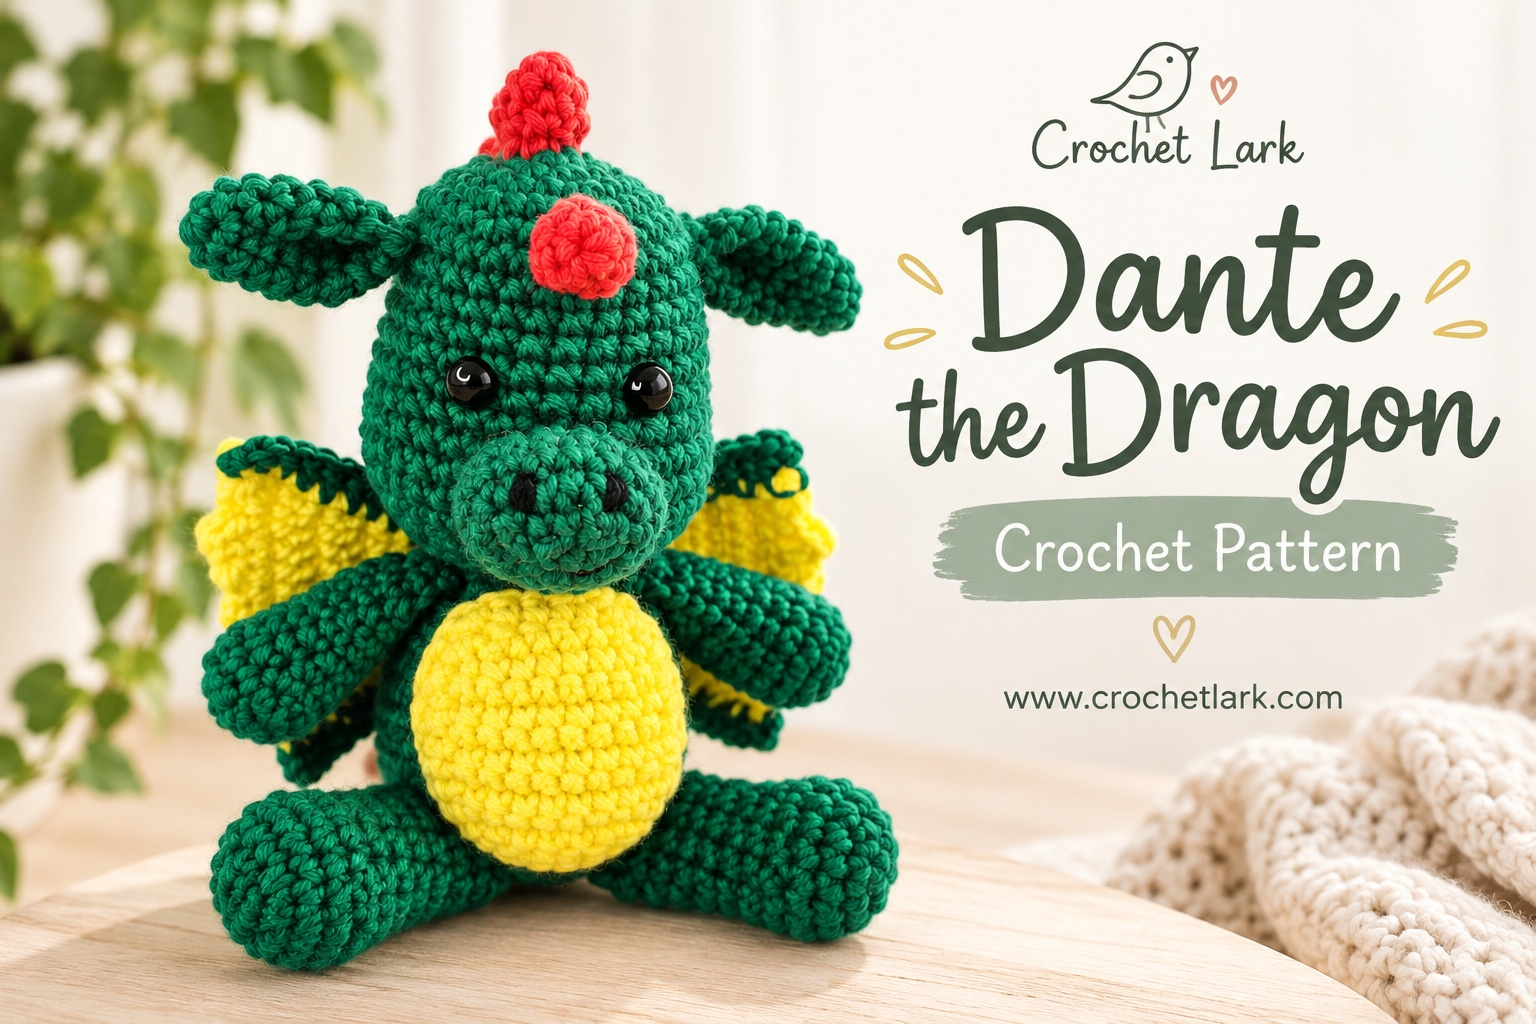
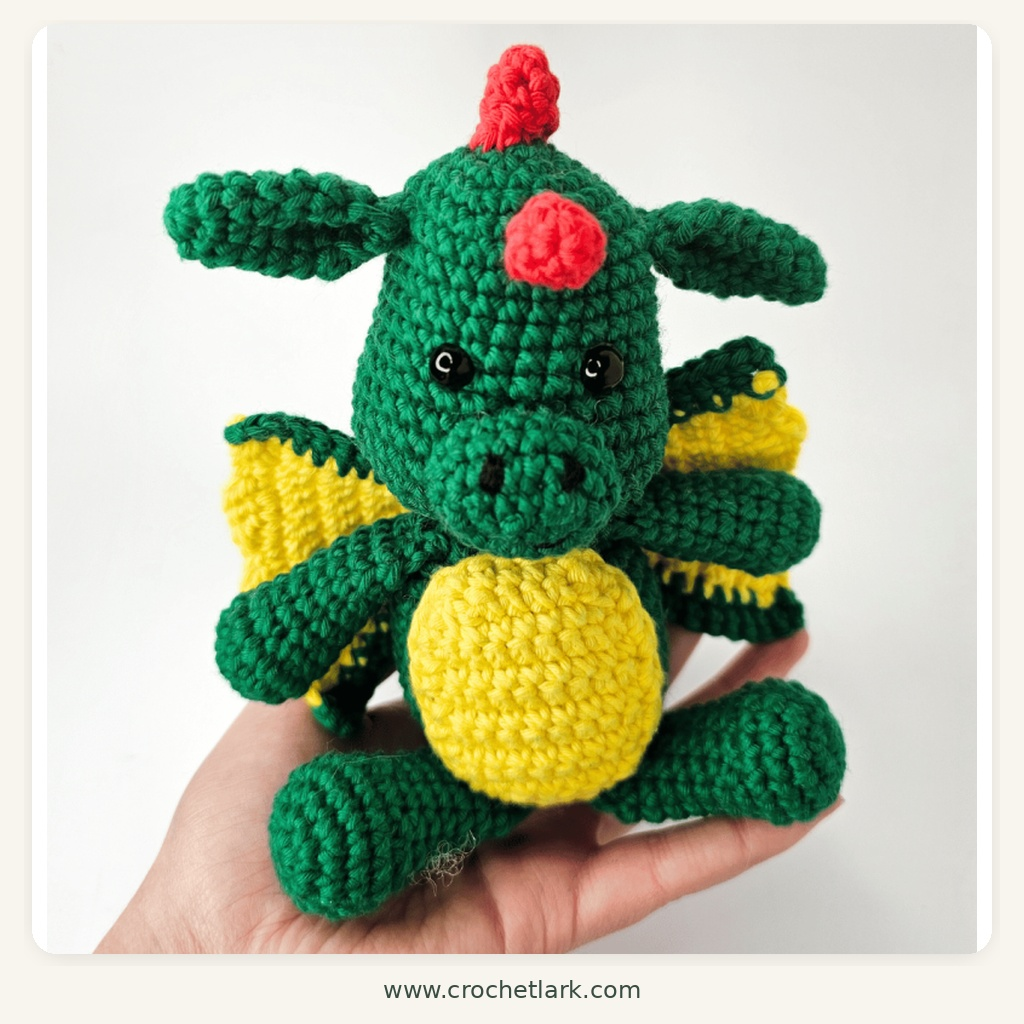
Dante is a playful crochet dragon with a rounded green body, yellow tummy, bright yellow wings, red spikes, floppy ears, and a long tapered tail.
This amigurumi project is made from several individually crocheted pieces that are stuffed and assembled at the end. Most of the pattern uses simple single crochet shaping, while the wings and tummy patch are worked flat.
The finished dragon has plenty of personality and makes a fun handmade gift, nursery decoration, or addition to an amigurumi collection.
Quick Answer
Dante the Dragon is an amigurumi crochet project made primarily with worsted-weight yarn and a 4 mm crochet hook.
The pattern includes separate instructions for the head, muzzle, body, legs, arms, ears, tail, tummy patch, wings, and eight decorative spikes.
The finished dragon measures approximately 16 cm / 6.3 inches tall when seated and about 13 cm / 5.1 inches across the wings when made with the specified materials and gauge.
Why You’ll Love This Project
Dante combines relatively simple crochet shapes to create a detailed fantasy character.
The rounded head and body establish the basic amigurumi shape, while the yellow wings, contrasting tummy patch, tapered tail, and bright red spikes give the dragon its distinctive appearance.
The project is also easy to customize. You can keep the original green, yellow, and red combination or create your own dragon color palette without changing the construction.
Materials
- Worsted-weight yarn in three colors:
- Color A – Green: approximately 56 g / 95 m / 104 yd
- Color B – Yellow: approximately 12 g / 21 m / 23 yd
- Color C – Red: approximately 12 g / 21 m / 23 yd
- 4 mm (G) crochet hook
- Polyester fiberfill
- Two 8 mm safety eyes
- Small amount of black yarn or embroidery thread
- Tapestry needle
- Scissors
- Stitch marker
- Sewing pins
The reference project uses Rico Creative Cotton Aran.
Finished Size
When made with the specified yarn, hook, and gauge:
- Height: approximately 16 cm / 6.3 inches when seated, including the top spike
- Width across wings: approximately 13 cm / 5.1 inches
Your finished measurements may vary slightly depending on yarn choice, hook size, stuffing, and crochet tension.
Gauge
Approximate reference gauge:
- 11 single crochet stitches = 5 cm / 1.96 inches
- 11 rows = 5 cm / 1.96 inches
Exact gauge is not critical for this amigurumi project, but your stitches should be tight enough to prevent the stuffing from showing through.
Abbreviations
US crochet terminology is used throughout.
- R – row or round
- st – stitch
- sts – stitches
- ch – chain
- sl st – slip stitch
- mc – magic circle
- sc – single crochet
- hdc – half double crochet
- dc – double crochet
- inc – increase; work 2 sc in the same stitch
- dec – decrease
- FLO – front loop only
- [ ] x N – repeat the instructions inside the brackets the stated number of times
- (N) – total number of stitches at the end of the row or round
Before You Begin
Most of the dragon is worked in continuous rounds. Do not join the rounds unless the instructions specifically tell you to do so.
Place a stitch marker in the first stitch of each round and move it upward as you work.
Use tight, even stitches to create a dense amigurumi fabric. An invisible decrease can help make the shaping cleaner.
Stuff the head and body firmly. The arms, legs, and tail should be stuffed more lightly toward the attachment points so they remain flexible.
The ears and red spikes are not stuffed.
Pin all pieces into position before sewing. Accurate assembly makes a noticeable difference to the finished shape and expression.
For a toy intended for a child under three years old, embroidered eyes are preferable to plastic safety eyes.
Crochet Instructions
Head
Using Color A – Green:
R1: 6 sc in mc. (6)
R2: Inc in each st around. (12)
R3: [1 sc, inc] x 6. (18)
R4: [2 sc, inc] x 6. (24)
R5: [3 sc, inc] x 6. (30)
R6–R11: Sc around. (30) for 6 rounds
R12: [5 sc, inc] x 5. (35)
R13: [6 sc, inc] x 5. (40)
R14–R15: Sc around. (40) for 2 rounds
R16: [6 sc, dec] x 5. (35)
Insert the safety eyes between Rounds 10 and 11, leaving approximately 5 stitches between the eyes.
If you prefer embroidered eyes, add them during finishing instead.
R17: [5 sc, dec] x 5. (30)
R18: [3 sc, dec] x 6. (24)
R19: [2 sc, dec] x 6. (18)
Begin stuffing the head firmly, paying particular attention to the sides and crown.
R20: [1 sc, dec] x 6. (12)
Finish stuffing.
R21: Dec x 6. (6)
Fasten off, leaving approximately 10–15 cm of yarn.
Thread the yarn tail through the front loops of the remaining six stitches and pull firmly to close the opening.
Secure and weave the yarn end into the head.
Muzzle
Using Color A – Green:
Start: Ch 5.
Round 1 is worked around both sides of the foundation chain.
Slip stitches and chains do not count toward the stitch totals.
R1: Beginning in the 2nd ch from the hook, work 2 sc in the first ch, sc in the next 2 ch, 4 sc in the last ch. Rotate the piece and continue along the opposite side of the starting chain. Sc in the next 2 ch, then work 2 sc in the final ch. Sl st to the first sc. (12)
R2: Ch 1, 2 sc in first st, sc in next 4 sts, 2 sc in each of the next 2 sts, sc in next 4 sts, 2 sc in last st. Sl st to first sc. (16)
R3: Ch 1, sc around. Sl st to first sc. (16)
R4: Ch 1, sc around. Sl st to first sc. (16)
Fasten off, leaving a long tail for sewing.
Weave in the starting yarn tail.
Body
Using Color A – Green:
R1: 6 sc in mc. (6)
R2: Inc around. (12)
R3: [1 sc, inc] x 6. (18)
R4: [2 sc, inc] x 6. (24)
R5: [3 sc, inc] x 6. (30)
R6: [4 sc, inc] x 6. (36)
R7–R10: Sc around. (36) for 4 rounds
R11: [4 sc, dec] x 6. (30)
R12–R13: Sc around. (30) for 2 rounds
R14: [3 sc, dec] x 6. (24)
R15: Sc around. (24)
R16: [2 sc, dec] x 6. (18)
R17: [1 sc, dec] x 6. (12)
R18: Sc around. (12)
Stuff the body firmly.
Fasten off, leaving a long yarn tail for attaching the body to the head.
Legs – Make 2
Using Color A – Green:
R1: 6 sc in mc. (6)
R2: Inc around. (12)
R3: [1 sc, inc] x 6. (18)
R4–R5: Sc around. (18) for 2 rounds
R6: [1 sc, dec] x 6. (12)
R7: Sc around. (12)
Stuff the foot firmly.
R8–R12: Sc around. (12) for 5 rounds
Stuff the upper portion lightly.
R13: Ch 1. Flatten the opening and work 6 sc through both layers to close the leg. (6)
Fasten off and leave a long tail for sewing.
Make the second leg in the same way.
Arms – Make 2
Using Color A – Green:
R1: 6 sc in mc. (6)
R2: Inc around. (12)
R3: [3 sc, inc] x 3. (15)
R4: Sc around. (15)
R5: [1 sc, dec] x 5. (10)
R6: Sc around. (10)
Stuff the hand firmly.
R7–R11: Sc around. (10) for 5 rounds
Stuff the upper arm lightly.
R12: Ch 1. Flatten the opening and work 5 sc through both layers. (5)
Fasten off with a long tail for sewing.
Repeat for the second arm.
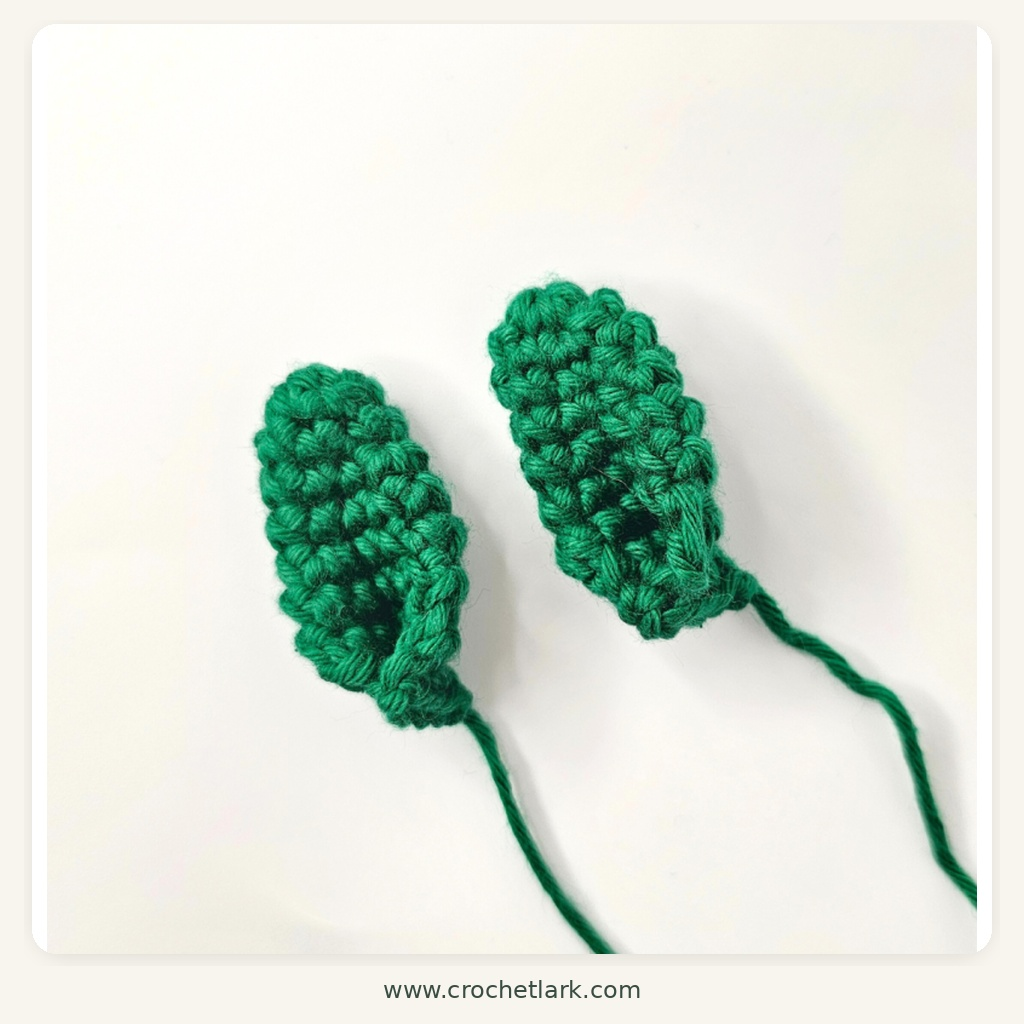
Ears – Make 2
Using Color A – Green:
Do not stuff the ears.
R1: 6 sc in mc. (6)
R2: [Inc, 2 sc] x 2. (8)
R3: Sc around. (8)
R4: 2 sc, inc, 5 sc. (9)
R5: 5 sc, inc, 3 sc. (10)
R6: Inc, 9 sc. (11)
R7: 5 sc, inc, 5 sc. (12)
R8: Ch 1. Flatten the opening and work 6 sc through both layers. (6)
R9: Ch 1. Fold the flattened ear in half again and work 3 sc through both layers. (3)
Fasten off, leaving a long yarn tail for sewing.
Repeat for the second ear.
Red Spikes – Make 8
Using Color C – Red:
Do not stuff.
R1: 5 sc in mc. (5)
R2: Inc, 4 sc. (6)
R3: 3 sc, inc, 2 sc. (7)
Fasten off with a long yarn tail for sewing.
Make 8 spikes total.
Tail
Using Color A – Green:
Before making the starting chain, leave a long yarn tail for attaching the wide end of the finished tail to the body.
Start: Ch 24.
Sl st to the first ch to form a ring, making sure the chain is not twisted.
R1: Ch 1, sc in the same ch as the joining sl st, then sc in the next 23 ch. Sl st to the first sc. (24)
R2: Ch 1, sc around. (24)
From this point, continue working in continuous rounds.
R3: [4 sc, dec] x 4. (20)
R4–R5: Sc around. (20) for 2 rounds
R6: [3 sc, dec] x 4. (16)
R7–R9: Sc around. (16) for 3 rounds
R10: [2 sc, dec] x 4. (12)
R11: Sc around. (12)
R12: [4 sc, dec] x 2. (10)
R13: Sc around. (10)
R14: [3 sc, dec] x 2. (8)
R15: [2 sc, dec] x 2. (6)
R16: [1 sc, dec] x 2. (4)
Fasten off.
Thread the final yarn tail through the remaining four stitches and pull closed.
Stuff the tail lightly, keeping the pointed end relatively soft.
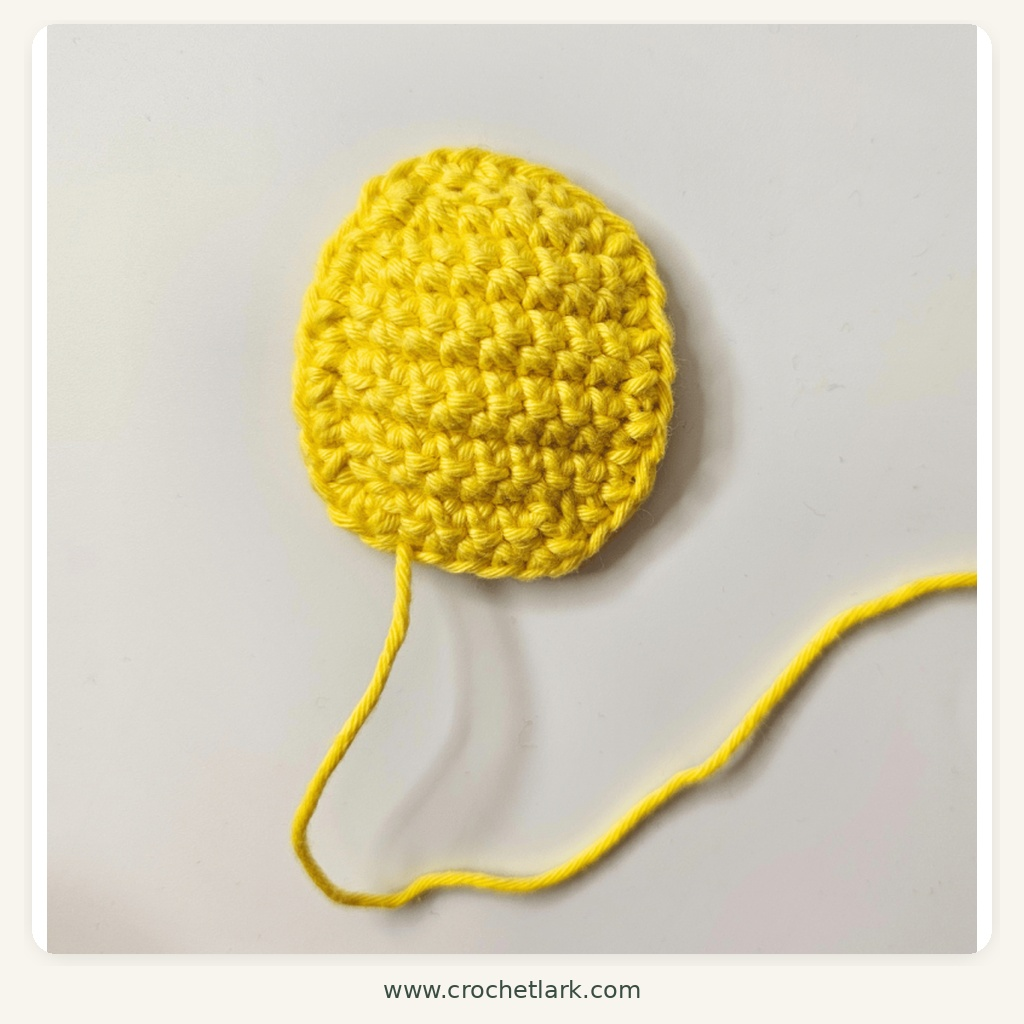
Tummy Patch
Using Color B – Yellow:
This section is worked back and forth in rows.
Turning chains do not count as stitches.
Start: Ch 6.
R1: Beginning in the 2nd ch from the hook, sc across. Ch 1, turn. (5)
R2: Inc, 3 sc, inc. Ch 1, turn. (7)
R3: Inc, 5 sc, inc. Ch 1, turn. (9)
R4–R7: Sc across. Ch 1, turn. (9) for 4 rows
R8: Dec, 5 sc, dec. Ch 1, turn. (7)
R9: Dec, 3 sc, dec. Ch 1, turn. (5)
The next round is worked around the entire outside edge of the patch.
R10: Sc in next 4 sts, inc in last st. Rotate the piece and place 8 sc evenly down the first long side, then inc in the final st of that side. Rotate across the foundation-chain edge and sc in next 4 ch, inc in last ch. Rotate to the second long side and place 8 sc evenly along the edge, then inc in the final st. Sl st to the first sc. (32)
The joining slip stitch does not count toward the stitch total.
Fasten off, leaving a long sewing tail.
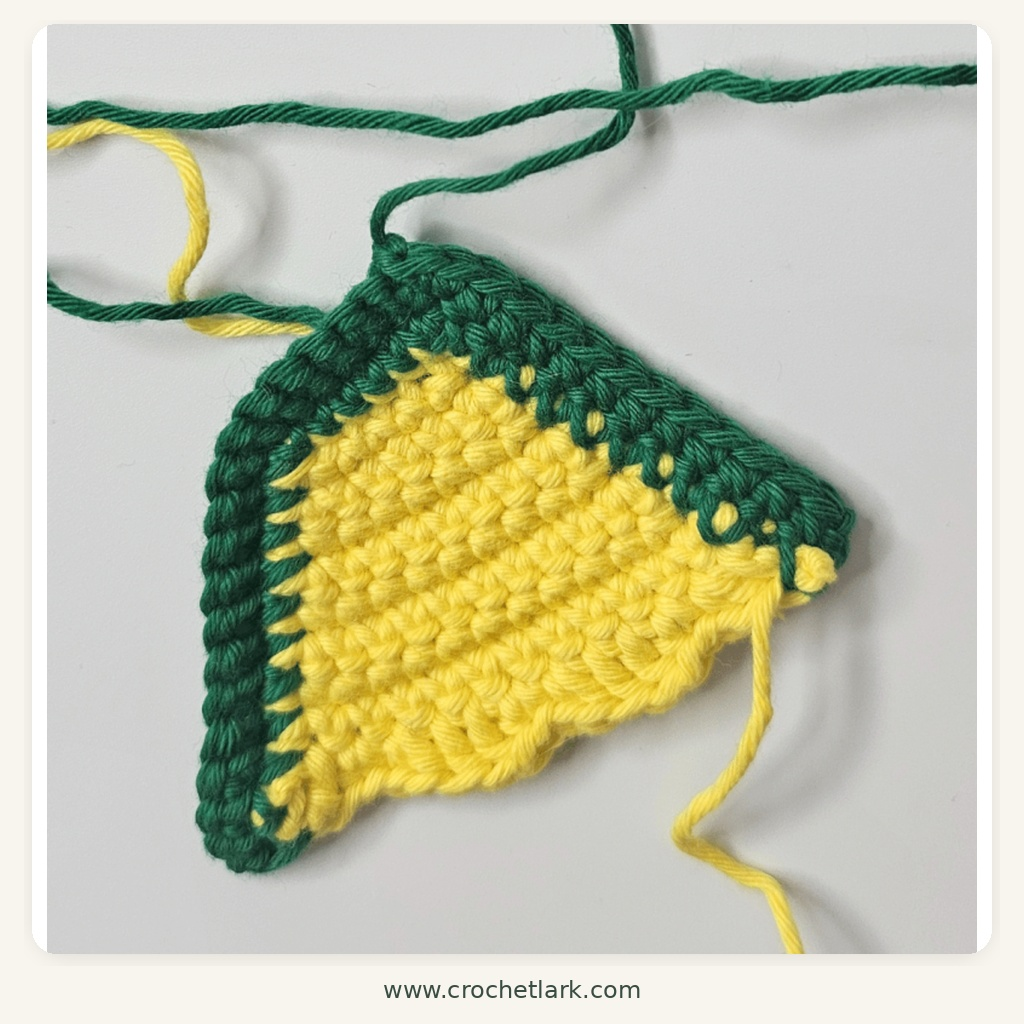
Wings – Make 2
Begin with Color B – Yellow.
The wing is worked back and forth in rows.
Turning chains do not count as stitches.
Start: Ch 7.
R1: Beginning in the 2nd ch from the hook, sc in next 6 sts. Ch 1, turn. (6)
R2: Inc, 4 sc, inc. Ch 1, turn. (8)
R3: 8 sc. Ch 1, turn. (8)
R4: Inc, 6 sc, inc. Ch 1, turn. (10)
R5: 10 sc. Ch 1, turn. (10)
R6: Inc, 8 sc, inc. Ch 1, turn. (12)
R7: 12 sc. Ch 1, turn. (12)
R8: 12 sc. Ch 3, turn. (12)
R9: Repeat the following sequence 3 times:
- In next st: dc, hdc, sc
- In next st: sc, hdc
- In next st: dc
(18)
Fasten off Color B.
Green Wing Border
Attach Color A – Green to the first stitch of the original foundation chain.
R10: Ch 1, sc in same st, sc in next 4 sts, inc in last st.
Rotate and work down the first long edge:
- Sc in next 9 sts
- Inc in next st
Ch 1 and turn.
Work back along the same side:
- Sc in next 11 sts
Continue across the lower edge:
- Sc in next 7 sts
Ch 1 and turn to work up the opposite long side:
- Sc in next 12 sts
Ch 1 and turn.
Work back down the same side:
- Sc in next 12 sts
Sl st to the nearest sc on the short edge.
Because the border travels around several sides of the wing rather than forming a conventional row, no final stitch count is assigned to this edging round.
Fasten off with a long tail for sewing.
Repeat for the second wing.
Assembly
Before permanently attaching anything, pin all the pieces onto the dragon and compare the positioning from the front, sides, and back.
Small adjustments at this stage can significantly improve the final proportions.
Attach the Muzzle
Position the green muzzle on the lower front of the head.
The approximate placement is:
- Top edge between Rounds 11 and 12
- Bottom edge between Rounds 15 and 16
Pin the muzzle evenly.
Using the long yarn tail, sew around the outer edge of the muzzle.
Before closing the final section, make sure the muzzle sits smoothly against the face.
Attach the Ears
Position one ear on each side of the head.
Attach them approximately between Rounds 6 and 7.
Leave approximately 13 stitches between the ears across the front of the head.
Angle the ears slightly outward rather than pointing them directly upward.
Sew securely through the folded base of each ear.
Attach the Body to the Head
Center the body directly beneath the head.
The body opening attaches around approximately Rounds 20–21 of the head.
Pin the pieces together before sewing.
Check the dragon from the front to make sure the body is aligned with the center of the face.
Use the body’s long yarn tail to sew securely around the neck opening.
Attach the Tummy Patch
Center the yellow tummy patch on the front of the body.
The patch should cover approximately Rounds 7 through 18 of the body.
Pin the entire patch before sewing so that it remains symmetrical.
Using the long yellow yarn tail, sew around the edge with small, even stitches.
Attach the Legs
Place the legs on the lower front of the body to create the seated position.
Attach each leg around Rounds 5–6 of the body.
Leave approximately 3 stitches between the centers of the two legs.
Angle the feet slightly outward.
Pin both legs before sewing so their positions match.
Sew firmly along the flattened upper edge of each leg.
Attach the Arms
Position one arm on each side of the upper body.
Each arm sits on a slight diagonal.
Approximate placement:
- Front edge between Rounds 17 and 18
- Back edge between Rounds 16 and 17
Pin both arms into position before sewing.
Attach through the flattened edge with the long green yarn tails.
Attach the Tail
Position the wide end of the tail in the center of the lower back.
The tail attachment spans approximately Rounds 5 through 11 of the body.
Pin the tail carefully so it extends backward naturally.
Use the long starting yarn tail to sew around the base securely.
Attach the Wings
Weave in all loose wing yarn ends except the long sewing tails.
Position one wing on each side of the upper back.
Approximate placement:
- Wings attach between Rounds 10 and 16 of the body
- The two upper inner corners should nearly meet
- Leave approximately 4 stitches between the lower inner corners
Pin both wings before sewing to make sure they sit at an even height.
Sew securely along the green inner edges.
Attach the Spikes
Arrange all 8 red spikes before sewing any of them permanently.
The spikes form one continuous line:
- Beginning near the top-front section of the head
- Continuing across the crown
- Running down the center of the back
- Continuing between the wings
- Extending onto the tail
Space the spikes as evenly as possible.
Once satisfied with their placement, sew each spike securely around its base.
Embroider the Face
Using black yarn or embroidery thread, add:
- Two small nostrils to the muzzle
- A short mouth beneath the nostrils
Keep the embroidery subtle so it complements the safety eyes without overwhelming the face.
[IN-ARTICLE IMAGE 5 – OPTIONAL FINISHED DETAIL]
Finishing
Check the entire dragon carefully for loose yarn ends.
Weave all remaining ends securely into the stuffed pieces.
Adjust the stuffing with your fingers if needed so the head, body, feet, and muzzle maintain smooth rounded shapes.
Check the ears and wings from both the front and back to make sure they sit symmetrically.
Gently shape the tail so it extends naturally behind the dragon.
Finally, straighten the red spikes along the head, back, and tail.
Helpful Notes
Use sewing pins generously during assembly. Pinning every component before sewing helps prevent uneven limbs, tilted wings, or an off-center tummy patch.
Keep the head and body firmly stuffed so they maintain their shape. The upper portions of the arms and legs should remain slightly softer so they can sit naturally against the body.
Do not stuff the ears or red spikes.
Stuff the tail lightly rather than firmly. This allows it to retain the tapered shape without becoming bulky.
When attaching the tummy patch, place your stitches close to the outside edge so the seam remains neat and unobtrusive.
The wing placement is especially important. Check the dragon from the back before sewing to confirm both wings sit at the same height and angle.
If you substitute another yarn weight, the finished dragon will change size. Choose a hook small enough to maintain a dense amigurumi fabric.
FAQ
Is this dragon crochet pattern suitable for beginners?
The individual stitches are beginner-friendly, but the project contains several shaped pieces and requires careful assembly.
It is best suited to an intermediate crocheter or an adventurous beginner who already understands magic circles, increases, decreases, working in continuous rounds, and sewing amigurumi pieces together.
What yarn is best for this crochet dragon?
The reference dragon uses worsted-weight cotton yarn.
Other worsted-weight yarns can work as long as they produce a firm fabric with your chosen hook.
Cotton gives the stitches crisp definition, while acrylic can create a slightly softer finished toy.
Can I change Dante’s colors?
Absolutely.
The original color scheme uses a green body, yellow belly and wings, and red spikes, but the construction remains unchanged if you choose different colors.
Try combinations such as blue and silver, purple and pink, or forest green and orange.
Can I use embroidered eyes instead of safety eyes?
Yes.
Embroidered eyes are a good alternative, particularly when making the dragon for a baby or young child.
Does gauge matter for this pattern?
Gauge does not affect fit in the same way it would for a garment.
However, maintaining tight, consistent stitches is important because loose crochet fabric can allow the stuffing to become visible.
Why are the wings worked flat?
Working the wings in rows creates the broad triangular shape and decorative outer edge needed for the dragon’s wings.
A contrasting green border then defines the wing shape and provides a sturdy attachment edge.
How many spikes does Dante have?
The pattern calls for eight red crochet spikes.
They are arranged from the top of the head, down the back, and onto the tail.
How large is the finished dragon?
Using the specified yarn, hook, and gauge, Dante measures approximately 16 cm / 6.3 inches tall when seated and about 13 cm / 5.1 inches across the wings.
Final Thoughts
Dante the Dragon is a charming amigurumi project that combines classic crochet shaping with colorful fantasy details.
The individual components are straightforward, but taking your time during assembly is essential. Carefully positioning the muzzle, ears, limbs, wings, tail, and spikes will help maintain the distinctive proportions of the finished dragon.
Once assembled, Dante makes a fun handmade character for gifting, decorating, or adding to a crochet toy collection.