
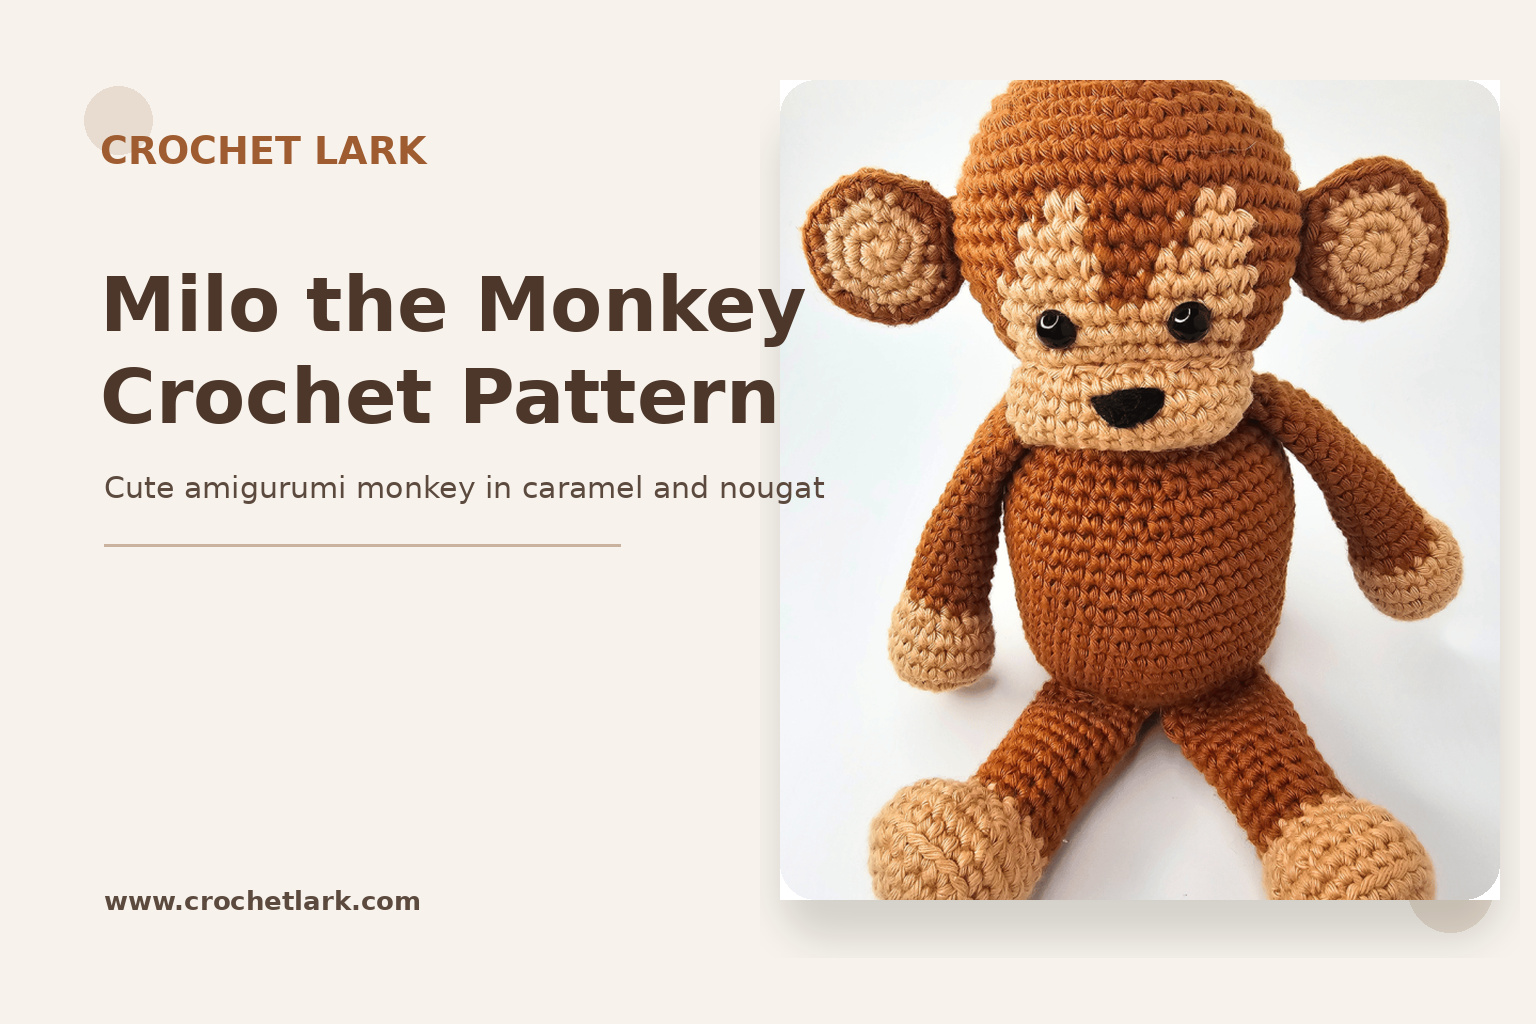
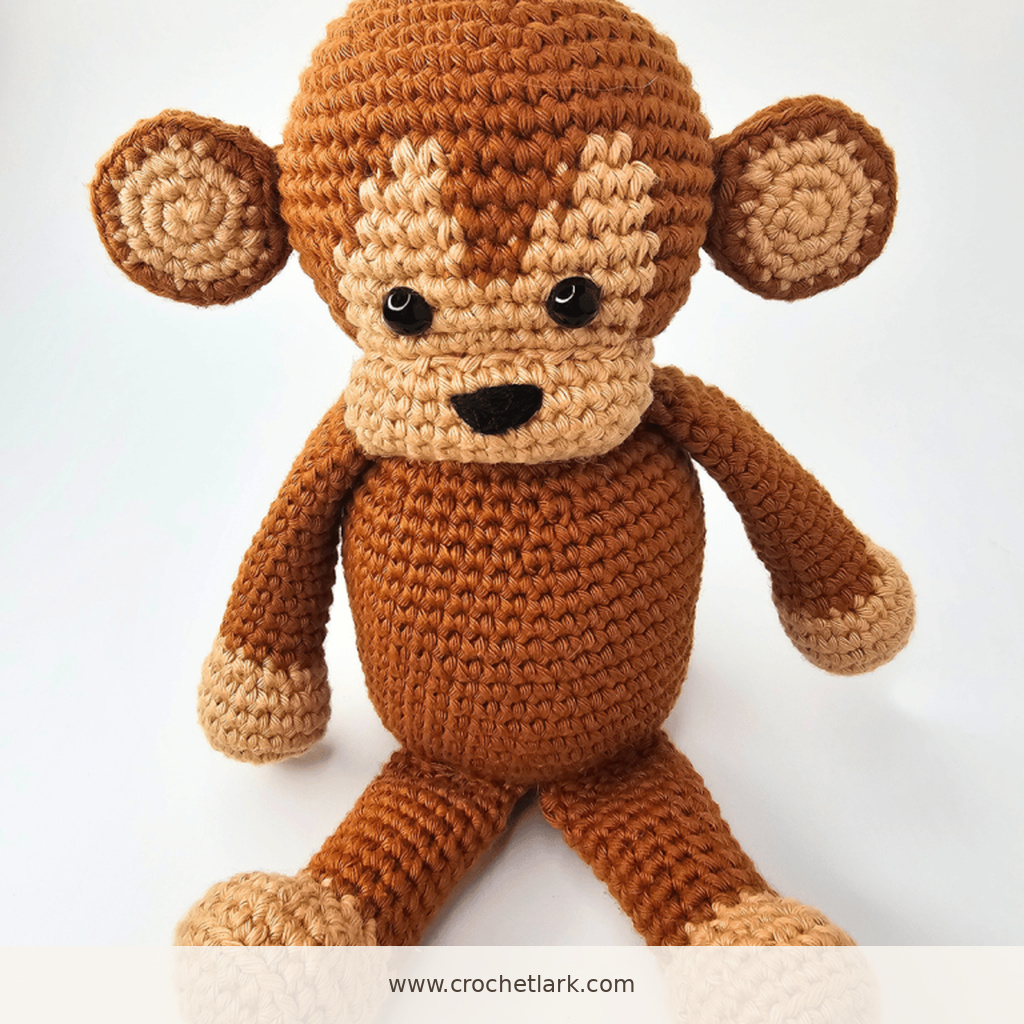
This monkey crochet pattern creates an expressive amigurumi toy with a warm caramel body, nougat-colored paws and muzzle, rounded ears, long limbs, and a slim curved tail.
Most of the project uses basic single crochet shaping. The main intermediate element is the colorwork on the face, where careful stitch counting keeps the lighter sections symmetrical.
Quick Answer
Milo is worked in separate pieces using DK cotton yarn and a 3.5 mm crochet hook. You will crochet the body, head, muzzle, two ears, two arms, two legs, and tail before sewing everything together. The source sample measures approximately 22 cm / 8.6 inches high.
[DOWNLOAD PDF BUTTON — Milo the Monkey Printable Crochet Pattern]
Why You’ll Love This Project
Milo has classic amigurumi construction without overly complicated stitches. The contrast face, large rounded ears, long paws, and narrow tail give the finished monkey plenty of personality.
The pattern is especially suitable for crocheters already comfortable with magic circles, single crochet, increases, decreases, working in continuous rounds, and changing yarn colors.
Materials
You will need:
- Yarn A – Caramel: 86 g / 129 m / 141 yd
- Yarn B – Nougat: 25 g / 37.5 m / 41 yd
- Hobbii Friends Cotton 8/8 or a comparable DK cotton yarn
- 3.5 mm (E) crochet hook
- Polyester toy stuffing
- 8 mm safety eyes or black yarn/embroidery thread for embroidered eyes
- Black embroidery yarn or thread for the nose
- Yarn needle
- Scissors
- Pins
- Stitch marker
The original pattern uses Hobbii Friends Cotton 8/8. Hobbii identifies 8/8 cotton as DK weight.
Finished Size
With the listed yarn and a 3.5 mm hook, the source sample measures approximately:
Height: 22 cm / 8.6 in
Width: 13 cm / 5.1 in
Your finished size may vary with yarn choice and personal tension.
Gauge
Gauge is not essential for this amigurumi pattern.
The source reference gauge is:
11 sc = 5 cm / 1.96 in
11 rows = 5 cm / 1.96 in
Abbreviations
This pattern uses US crochet terminology.
- R – round/row
- st / sts – stitch / stitches
- ch – chain
- sl st – slip stitch
- mc – magic circle
- sc – single crochet
- inc – increase; work 2 sc in one stitch
- dec – decrease
- FLO – front loop only
- BLO – back loop only
- ccA – change to Yarn A
- ccB – change to Yarn B
- [ ] x # – repeat the instructions inside the brackets the stated number of times
- ( ) – stitch count at the end of the round
Before You Begin
Work the amigurumi pieces in continuous rounds unless the instructions specifically tell you to join. Place a stitch marker in the first stitch and move it up after every round.
For color changes, make the final yarn-over of the stitch before the color change with the new yarn. Invisible decreases are recommended to produce a cleaner amigurumi surface.
Stuff gradually rather than forcing a large amount of filling into the finished piece.
Important pattern verification note: the source currently prints Leg R2-R4 with “x2” repeats, while also listing stitch totals of 12, 18, and 24. Starting from 6 stitches, those totals mathematically require x6, so the rounds below explicitly use x6 rather than silently reproducing the source typo.
The source also contains two different directions for where to route the ear sewing tail: the ear instructions reference the area between R5-R6, while the later assembly section references R3-R4. That discrepancy is noted below rather than silently resolved.
Crochet Instructions
Body
Use Yarn A – Caramel.
Stuff the body gradually as you work.
R1: 6 sc in mc. (6)
R2: inc in each st around. (12)
R3: [1 sc, inc] x6. (18)
R4: [2 sc, inc] x6. (24)
R5: [3 sc, inc] x6. (30)
R6: [4 sc, inc] x6. (36)
R7: [5 sc, inc] x6. (42)
R8: [6 sc, inc] x6. (48)
R9-R20: sc in every st for 12 rounds. (48)
R21: [6 sc, dec] x6. (42)
R22: sc around. (42)
R23: [5 sc, dec] x6. (36)
R24: sc around. (36)
R25: [4 sc, dec] x6. (30)
R26: sc around. (30)
R27: [3 sc, dec] x6. (24)
R28: [2 sc, dec] x6. (18)
Finish stuffing firmly.
Cut the yarn, leaving a long tail for joining the body to the head, and fasten off.
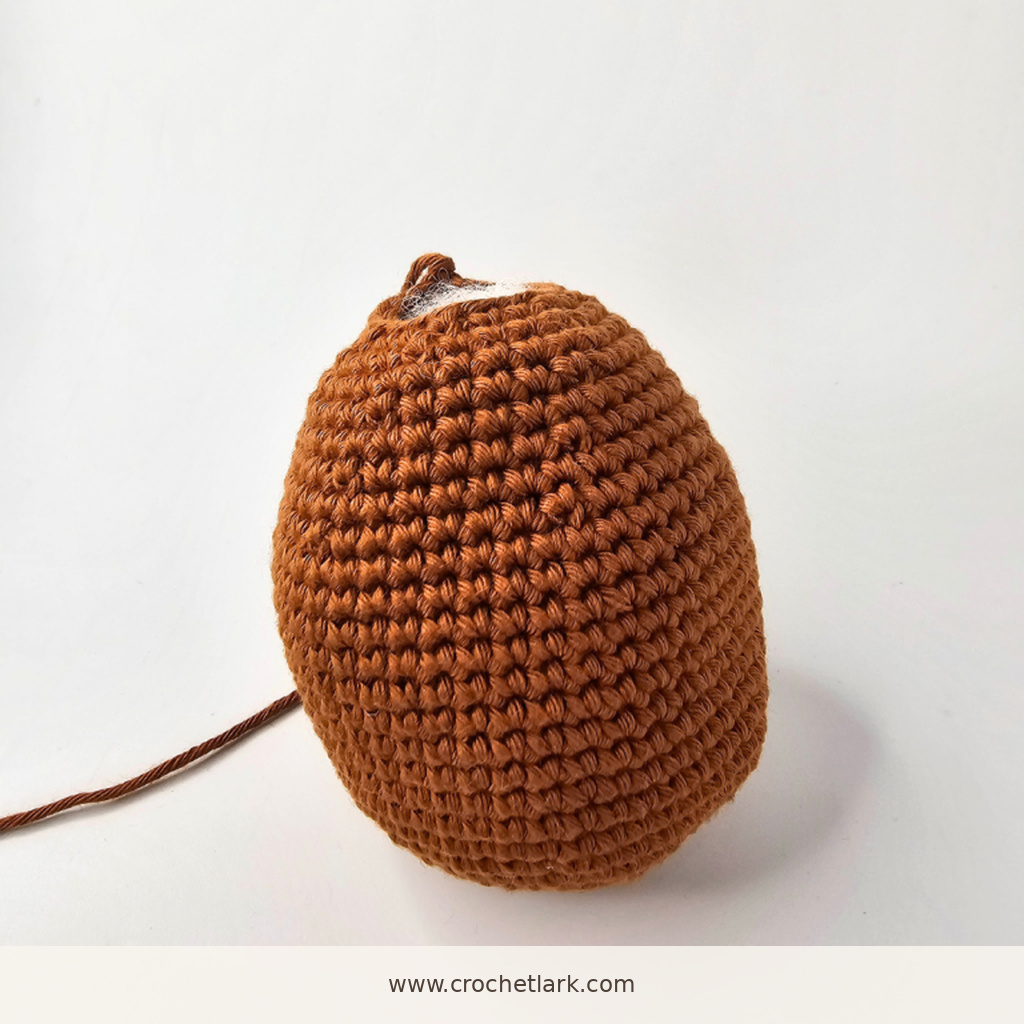
Head
Use Yarn A and Yarn B. Begin with Yarn A – Caramel and stuff as you work.
R1: 6 sc in mc. (6)
R2: inc x6. (12)
R3: [sc, inc] x6. (18)
R4: [2 sc, inc] x6. (24)
R5: [3 sc, inc] x6. (30)
R6: [4 sc, inc] x6. (36)
R7: [5 sc, inc] x6. (42)
R8: [6 sc, inc] x6. (48)
R9-R11: sc around for 3 rounds. (48)
Begin the face color changes.
R12: 19 sc, ccB, 2 sc, ccA, 4 sc, ccB, 2 sc, ccA, 21 sc. (48)
R13: 18 sc, ccB, 3 sc, ccA, 4 sc, ccB, 3 sc, ccA, 20 sc. (48)
R14: 18 sc, ccB, 4 sc, ccA, 2 sc, ccB, 4 sc, ccA, 20 sc. (48)
R15: 17 sc, ccB, 5 sc, ccA, 2 sc, ccB, 5 sc, ccA, 19 sc. (48)
R16: 17 sc, ccB, 12 sc, ccA, 19 sc. (48)
R17: 17 sc, ccB, 12 sc, ccA, 19 sc. (48)
R18: [6 sc, dec] x2, 1 sc, ccB, 5 sc, dec, 6 sc, ccA, dec, [6 sc, dec] x2. (42)
R19: [5 sc, dec] x2, 2 sc, ccB, 3 sc, dec, 5 sc, dec, ccA, [5 sc, dec] x2. (36)
R20: [4 sc, dec] x2, 2 sc, ccB, 2 sc, dec, 4 sc, dec, ccA, [4 sc, dec] x2. (30)
If you are using safety eyes, insert them between R16 and R17, leaving approximately 5 stitches between the eyes.
R21: [3 sc, dec] x6. (24)
Begin adding more stuffing.
R22: [2 sc, dec] x6. (18)
R23: [sc, dec] x6. (12)
Finish stuffing the head firmly.
R24: dec x6. (6)
Fasten off. Thread the yarn tail through the FLO of the remaining 6 stitches and pull firmly to close the opening. Bury the end inside the head.
Mouth / Muzzle
Use Yarn B – Nougat.
The muzzle begins with a chain. Work around both sides of that chain. Chains and joining slip stitches are not included in the stitch totals.
Start: ch 11.
R1: Beginning in the 2nd ch from the hook, work 2 sc in the first ch, sc in the next 8 ch, and 2 sc in the last ch. Turn to work along the underside of the starting chain. Work 2 sc in the next ch, sc in the next 8 ch, and 2 sc in the final ch. Sl st to the first sc. (24)
R2: ch 1. Work 2 sc in the same st as the previous join, sc in the next 10 sts, 2 sc in the next st, sc in the next 12 sts, then sl st to the first sc. (26)
R3: ch 1, sc around, sl st to join. (26)
R4: ch 1, sc around, sl st to join. (26)
Fasten off with a long sewing tail.
Leave the muzzle unstuffed while crocheting it. During assembly, sew approximately halfway around the piece, add stuffing, then finish sewing it closed against the head.
Ears — Make 2
Do not stuff.
Begin with Yarn B – Nougat.
R1: 6 sc in mc. (6)
R2: inc x6. (12)
R3: [sc, inc] x6. (18)
Change to Yarn A – Caramel.
R4: [2 sc, inc] x6. (24)
R5: BLO sc around. (24)
R6: [2 sc, dec] x6. (18)
R7: [sc, dec] x6. (12)
R8: dec x6. (6)
Fasten off with a long sewing tail.
Thread the tail through the FLO of the final 6 stitches and pull closed.
The component instructions say to route the remaining sewing tail to a corner stitch between R5 and R6. The source’s later assembly section instead mentions R3-R4. Pin the finished ear in its correct head position before committing to the sewing point, and avoid distorting the rounded ear shape.
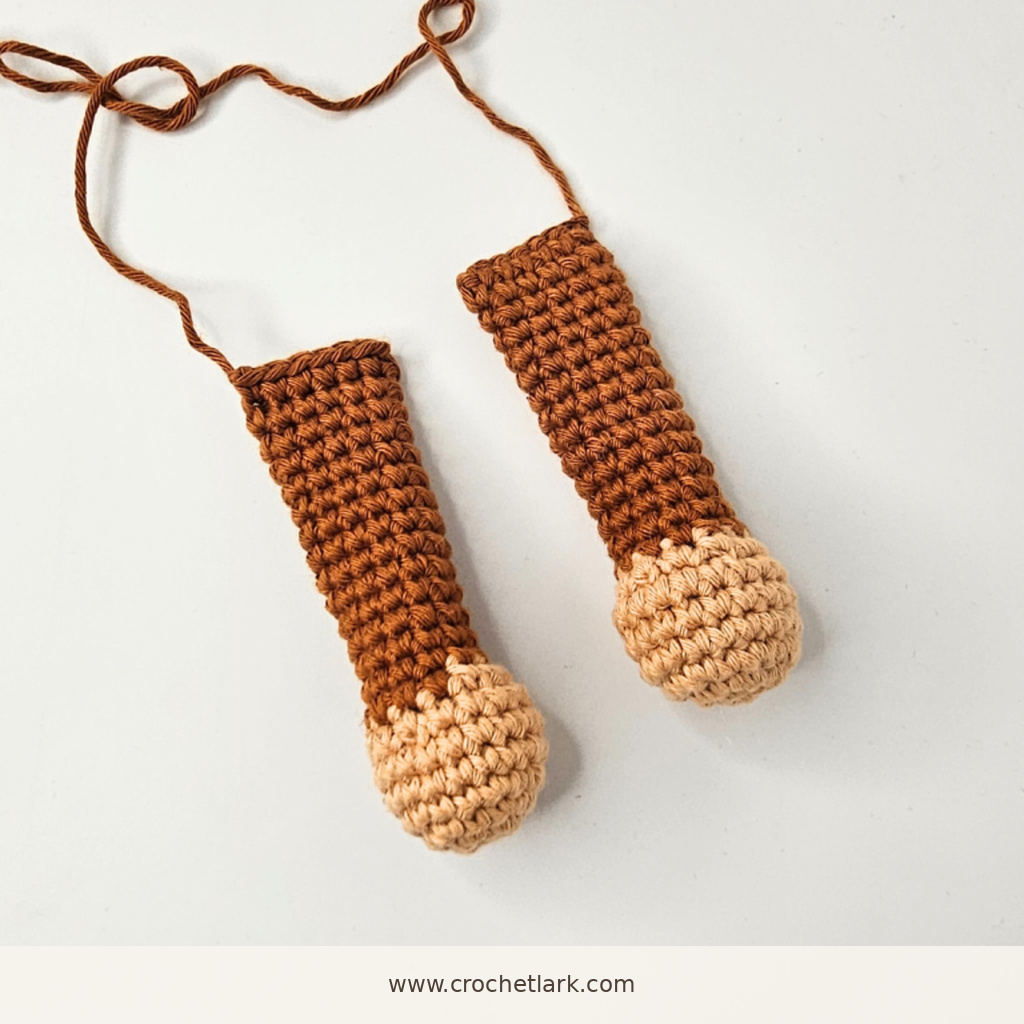
Arms — Make 2
Begin with Yarn B – Nougat.
R1: 6 sc in mc. (6)
R2: inc x6. (12)
R3: [sc, inc] x6. (18)
R4-R6: sc around for 3 rounds. (18)
R7: [sc, dec] x6. (12)
Change to Yarn A – Caramel.
R8-R12: sc around for 5 rounds. (12)
Firmly stuff the hand and lightly stuff the arm through approximately R12.
Do not continue adding stuffing above this area.
R13-R21: sc around for 9 rounds. (12)
R22: Flatten the top of the arm. Ch 1, then work 6 sc through both layers to close the opening. (6)
Fasten off, leaving a tail for sewing.
Repeat for the second arm.
Legs — Make 2
Begin with Yarn B – Nougat.
R1: 6 sc in mc. (6)
R2: inc x6. (12)
Correction noted above: the source prints x2, but six increases are required to reach the stated 12 stitches.
R3: [sc, inc] x6. (18)
R4: [2 sc, inc] x6. (24)
R5: BLO sc around. (24)
R6: sc around. (24)
R7: 6 sc, [dec, sc] x4, 6 sc. (20)
R8: 4 sc, [sc, dec] x4, 4 sc. (16)
R9: 5 sc, [dec, sc] x2, 5 sc. (14)
Change to Yarn A – Caramel.
R10-R14: sc around for 5 rounds. (14)
Stuff the foot firmly. Continue stuffing the leg above R9 more lightly.
R15-R18: sc around for 4 rounds. (14)
Finish the stuffing.
R19: Flatten the top. Ch 1, then work 7 sc through both layers. (7)
The source notes that you may need to shift the closing point by a stitch or two so the flattened upper edge sits horizontally relative to the back of the foot. Do not alter the 14-stitch round count itself.
Fasten off with a long sewing tail.
Repeat for the second leg.
Tail
Use Yarn A – Caramel.
Stuff the tail firmly as you work.
R1: 6 sc in mc. (6)
R2: [inc, 2 sc] x2. (8)
R3-R31: sc around for 29 rounds. (8)
Fasten off and leave a long tail for attaching the tail to the body.
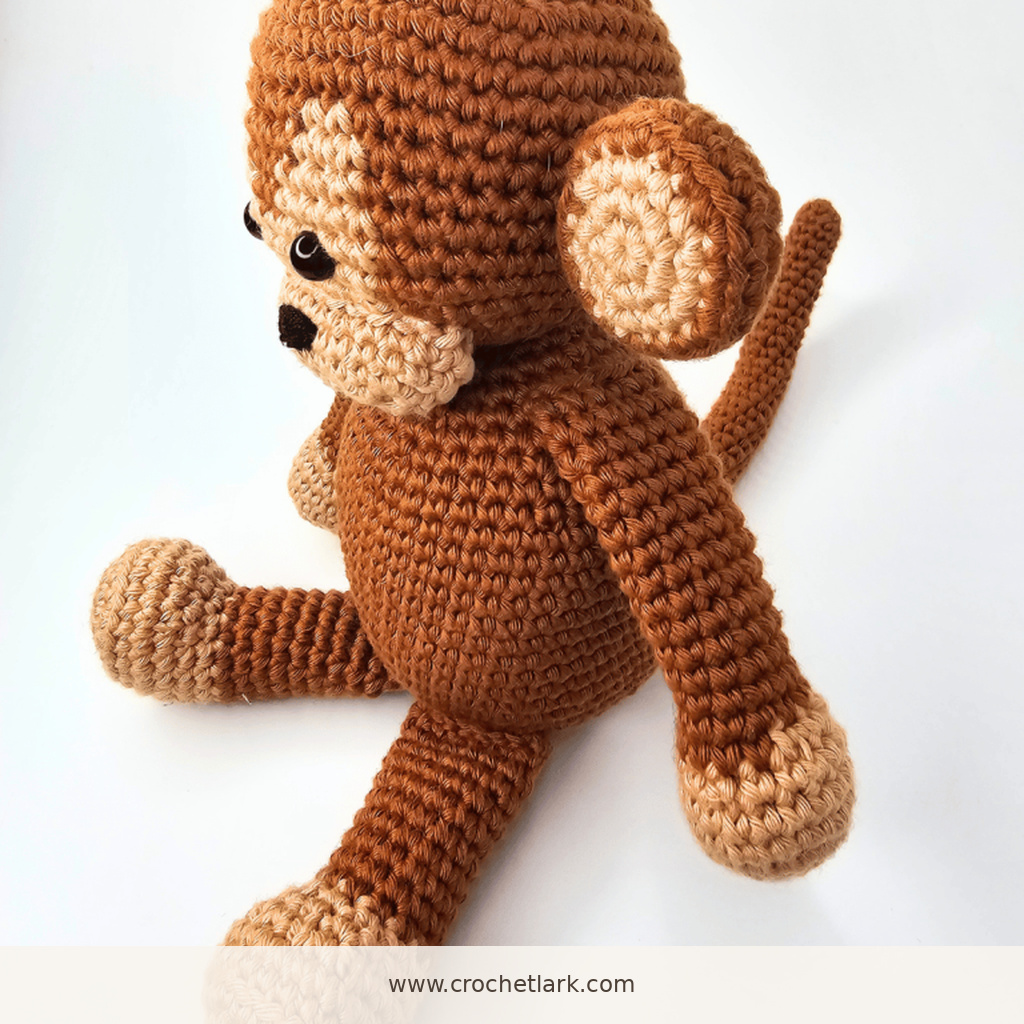
Assembly
1. Attach the Muzzle
Position the muzzle between Head R18 and R22.
The lighter Yarn B area of the face should sit centrally behind the muzzle.
Sew roughly halfway around the muzzle, add stuffing firmly, then complete the seam.
2. Attach the Ears
Pin an ear to each side of the head.
Place the ears on a slight angle across approximately Head R12-R15, with the nougat-colored section facing forward.
The source gives approximately:
20 stitches between the upper ear positions
22 stitches between the lower ear positions
Secure approximately 4 stitches of each ear to the head.
3. Join the Head to the Body
Use the long sewing tail from the body.
The head is attached on a slight angle. At the front, approximately Head R23-R24 meets the body. Toward the back, approximately Head R21-R22 sits against the body.
Pin carefully before sewing so the face points forward naturally.
4. Attach the Arms
Position the arms between Body R25 and R26.
Leave approximately 9 stitches between the arms across the front of the body.
Sew both arm tops securely.
5. Attach the Legs
Position the legs between Body R7 and R8.
Leave approximately 1 stitch between the legs across the front.
Pin both legs before sewing so the monkey can sit evenly.
6. Attach the Tail
Center the tail on the back of the body between approximately Body R6 and R10.
Sew the tail base securely.
7. Embroider the Nose
Using black embroidery yarn or thread, embroider a small filled nose on the upper center of the muzzle.
Finishing
Check all attachment seams before weaving in the final yarn tails.
Shape the body, head, paws, muzzle, and ears gently with your hands. Add or redistribute stuffing before completely closing any seam if one side appears uneven.
Weave yarn tails securely into the interior of the toy and trim only after the ends are well anchored.
Helpful Notes
Keep your amigurumi fabric dense enough that the stuffing does not show between stitches. If the fabric is too open, try a slightly smaller hook rather than simply packing in less stuffing.
Pin all paired pieces before sewing. Looking at the monkey from the front, side, and back makes it easier to keep the ears, arms, and legs symmetrical.
For a toy intended for a child under age 3, use securely embroidered eyes instead of safety eyes. The source also specifically warns that safety eyes can present a choking hazard.
FAQ
Is this monkey crochet pattern beginner-friendly?
The stitches themselves are basic, but the face includes several precise color changes. For that reason, this project is better suited to a confident beginner or intermediate crocheter.
How big is the finished crochet monkey?
With the specified yarn and 3.5 mm hook, the source sample measures approximately 22 cm / 8.6 inches high and 13 cm / 5.1 inches wide.
Can I use another yarn?
Yes. Changing yarn fiber or thickness will change the finished dimensions and may require a different hook. Keep the fabric sufficiently tight to prevent the stuffing from showing.
Do I have to use safety eyes?
No. You can embroider the eyes with black yarn or embroidery thread instead.
Why do Leg R2-R4 use x6 when the source page shows x2?
The source gives the finished stitch totals as 12, 18, and 24. Starting with 6 stitches, those totals mathematically require six repeats. This Crochet Lark version therefore prints x6 and clearly identifies the source discrepancy instead of silently altering it.
Final Thoughts
Milo combines straightforward amigurumi shaping with a detailed two-color face and distinctive long monkey limbs. Take extra time when placing the ears, muzzle, arms, and legs; careful pinning before sewing has the biggest effect on the finished expression and balance.
Once the final nose is embroidered and the yarn ends are secured, your crochet monkey is complete.